Build A Clock
11 Feb 2020 - Jake Sherwood
 build a clock
Build a clock
Update Summer 2020
Updated clock to connect to wifi and pull epoch for setting time automatically. Updated code here
Wifi Connected Clock
Our first assignment for Tangible Interaction was to build a clock.
As mentioned in my previous post I needed a clock for our bathroom. However, my more designed cork enclo sure was a bit more than needed for this assignment.
It was suggested to just keep it to a simple standoff panel enclosure. The only problem with that was, the way that I wanted the dot matrix display to sit behind the acrylic front panel. I didn’t want any attachment points visible from the front.
Which meant I needed to support it from the back. And needed a front and back panel.
At that point I was basically just making a box. So I went ahead and added side panels too. Which may or may not have been a good idea.
Materials
The materials I decided on were:
wood (for most of the enclosure) - sourced from Tanden Maker Space
acrylic front panel - left over material I had
Max7219 8 x 32 dot matrix sourced from Amazon
KY-040 rotary encoder x 2 sourced from Amazon
mini breadboard
brass standoffs sourced from Amazon
rubber feet - sourced from Brunos
Code
Coding actually ended up being the most time consuming part.
Both the rotary encoders and the dot matrix proved to be more difficult to work with than I expected.
I used the Encoder.h library for the encoders which was helpful. But constraining them to the ranges I wanted took a bit to work out. Also, handling the rotary button press took some time to get working the way I wanted only in certain modes.
The dot matrix was also somewhat of a pain. There were a ton of libraries available for the Max7219, which was great. But I ended up finding conflicts in a few of the libraries which prevented me from doing things exactly the way I originally wanted. In the end I used the MAX72xx.h and Parola.h libraries.
I have 4 modes: set, display time, display date, and googly eyes.
For setting the clock you turn the left rotary to the appropriate set mode. Pushing the left rotary cycles through setting hours, minutes, seconds, days, month, and year.
The right rotary adjusts the appropriate setting, pushing the right rotary sets the value.
The googly eyes animation was example code included in the MAX72xx lib. I thought it was fun and would make a fun addition to the feature set of my clock.
Code can be found here on github. With more time, there would be few things I would like to clean up in the code for better UX but it works as is for a prototype.
Breadboard layout & Schematic
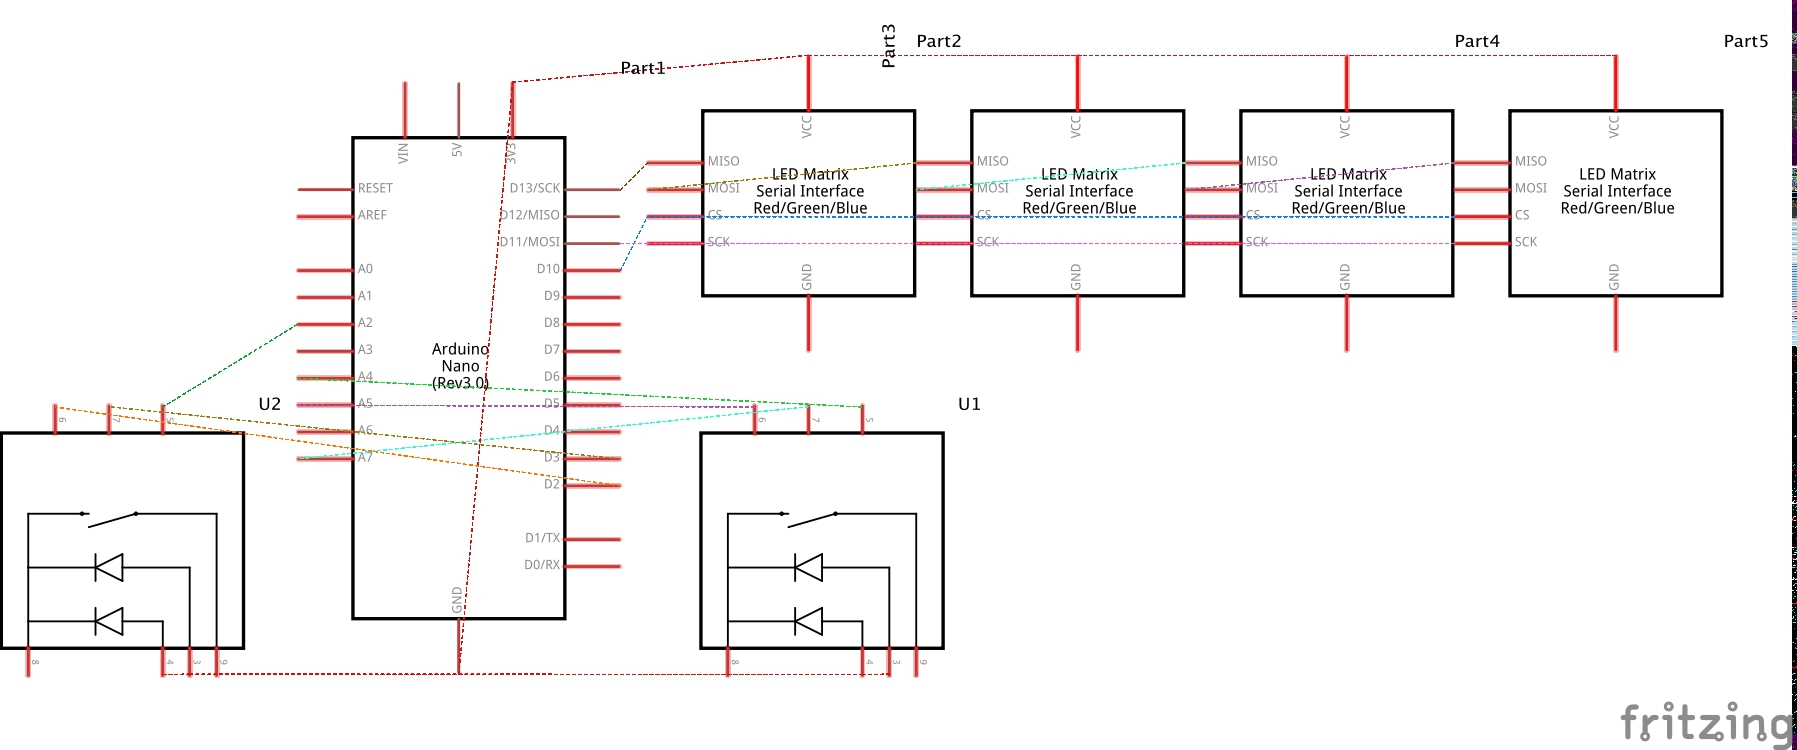
clock circuit
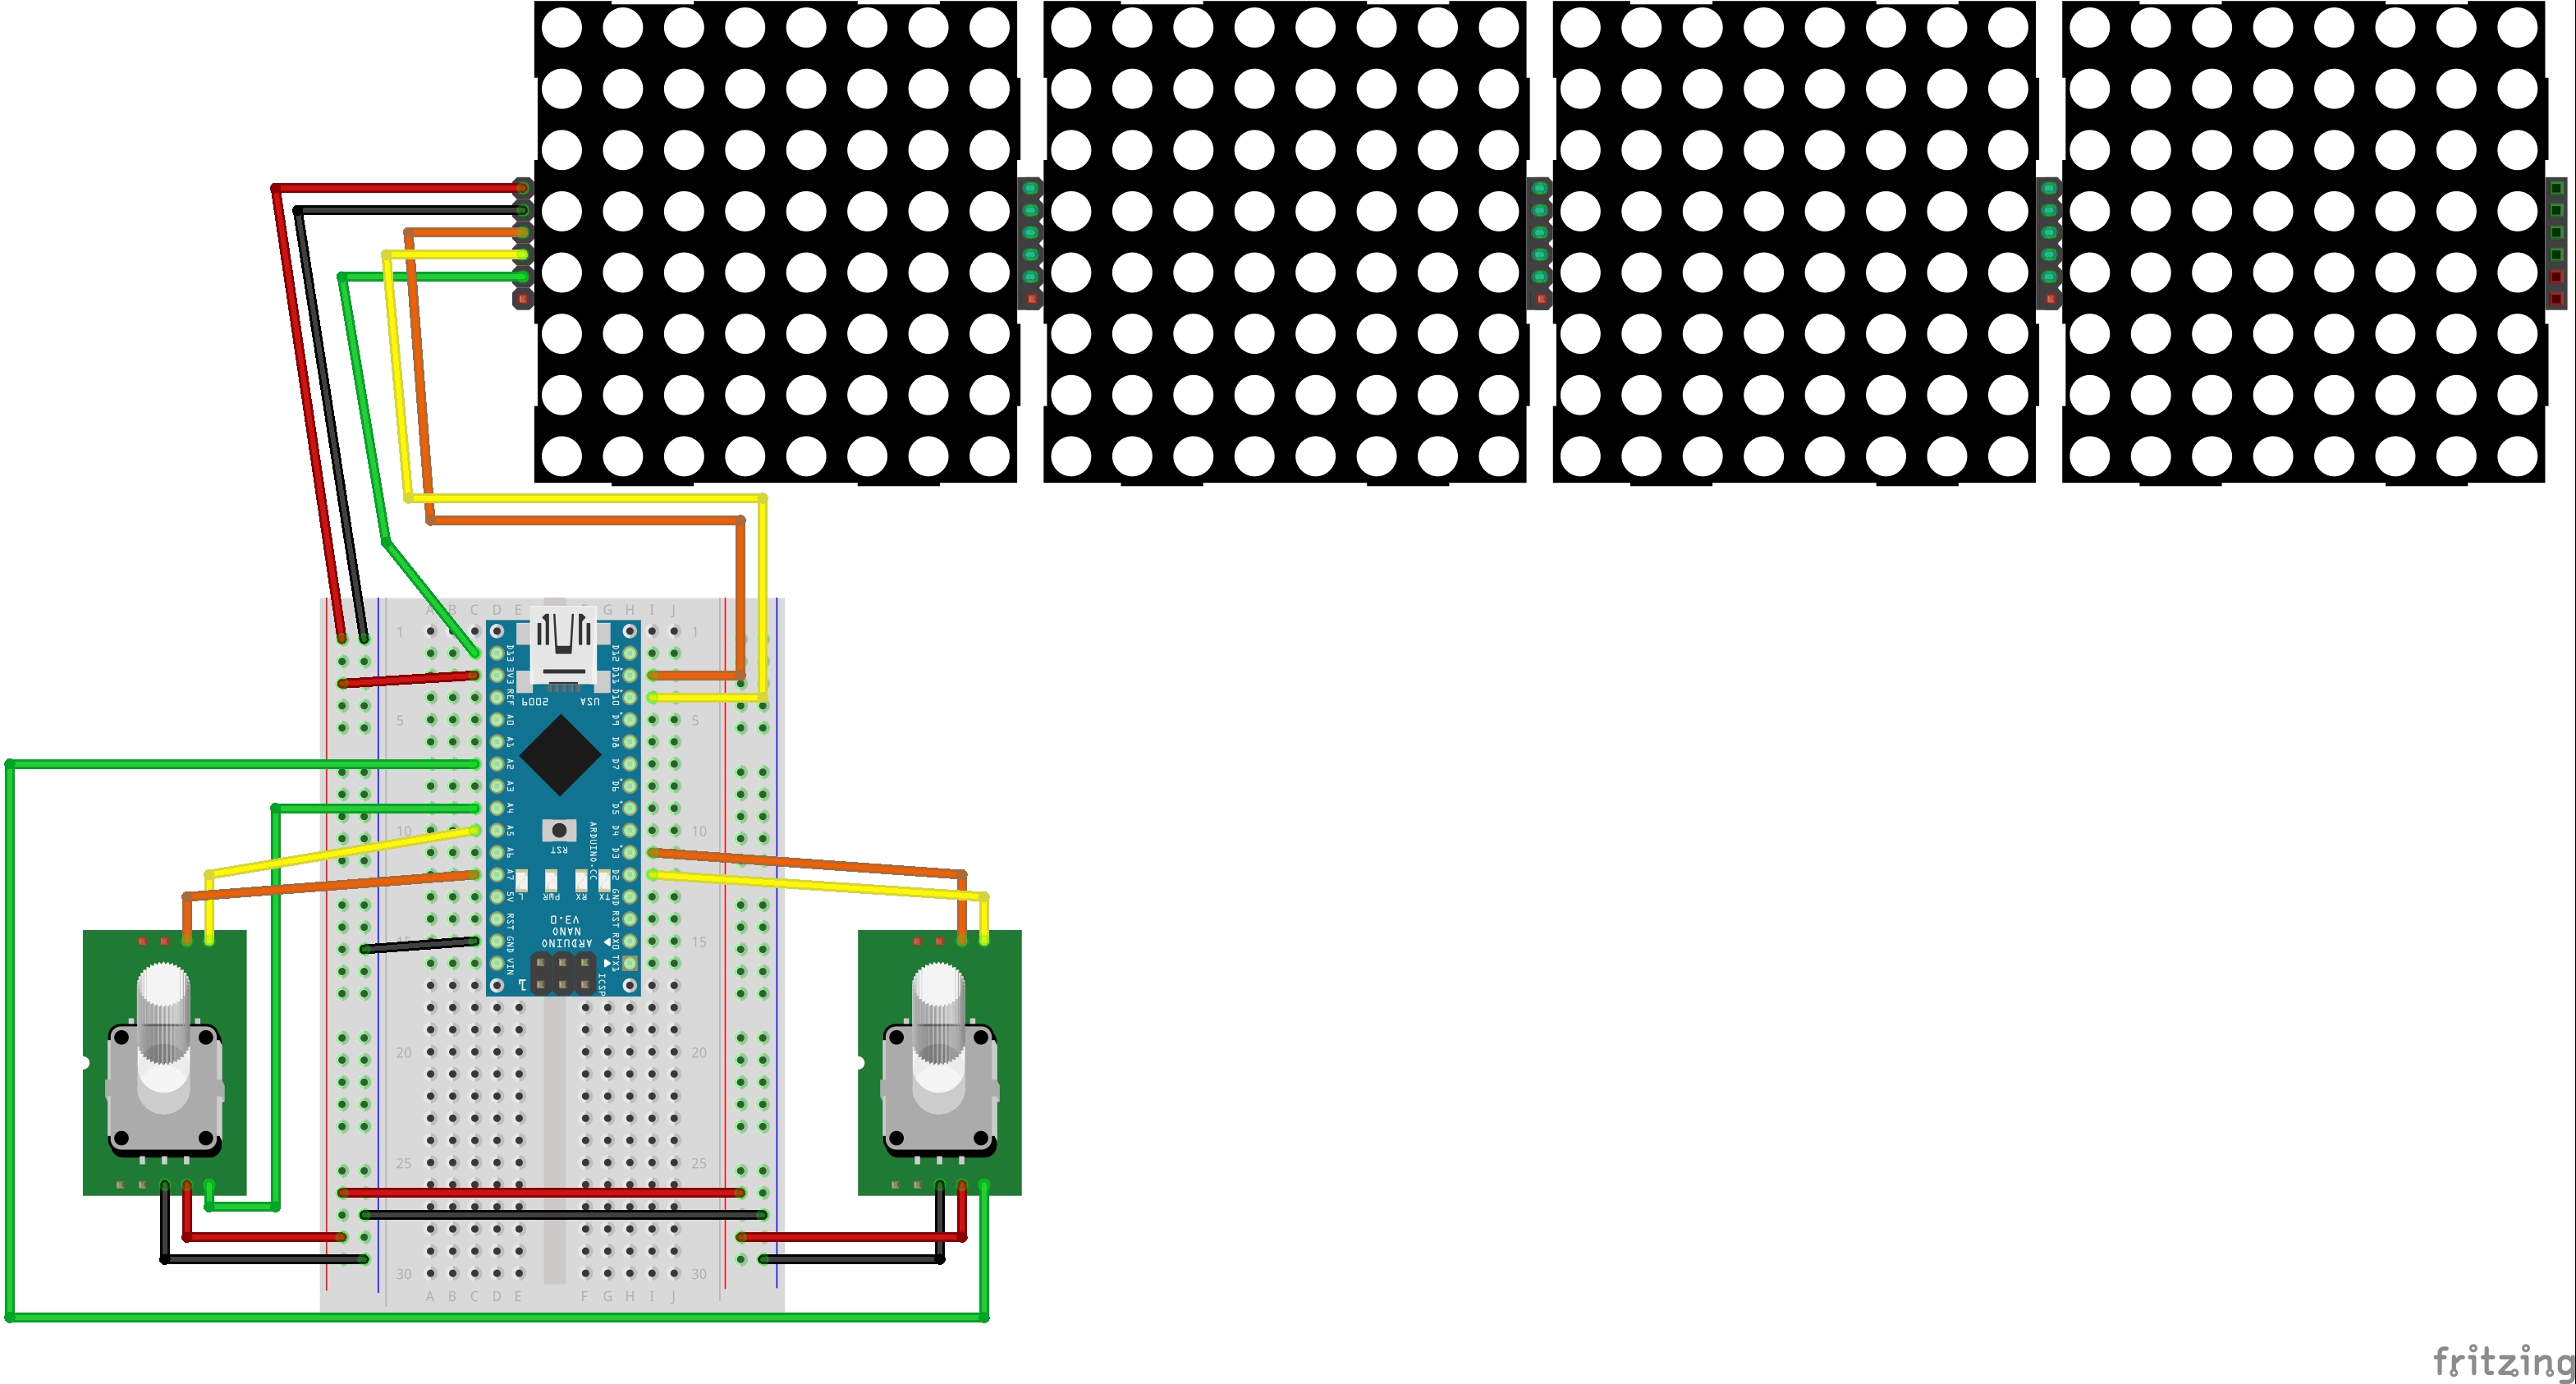
clock circuit breadboard
Fabrication
Simplifying my design from a cork enclosure to a simple panel enclosure really lighted the fab work load for me.
I felt pretty comfortable doing a simple top and bottom panel enclosure.
But as mentioned above I needed front and back panels so I ended up doing a full enclosure. It looks good but definitely makes it harder to access things.
Trying to find a way to support front and back panels I found this enclosure, built by Marty Rice which had a combo design using locking tabs and standoffs. I thought that would work great for my needs.
 enclosure example
I sketched out a few ideas, based on the example I found, took some measurements, and I was ready to head to Vectorworks to layout my panels for the laser.
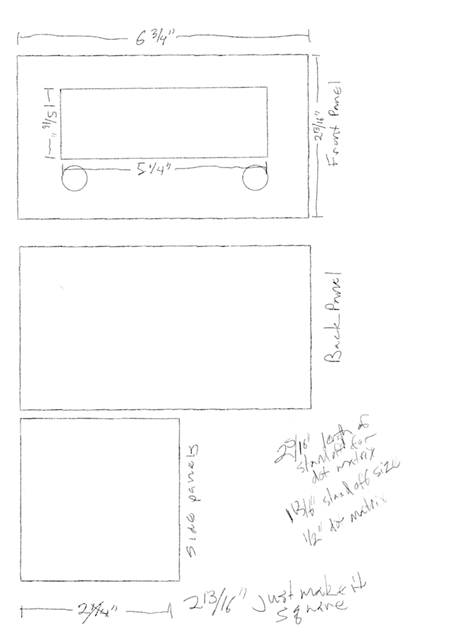
enclosure sketches
Using Vectorworks was great. In class I felt like I could do the same thing in Adobe Illustrator faster, but after working with Vectorworks for a while and began to see the benefit in it’s exactness.
I really like being able to easily put in exact measurements and duplicate certain aspects quickly.
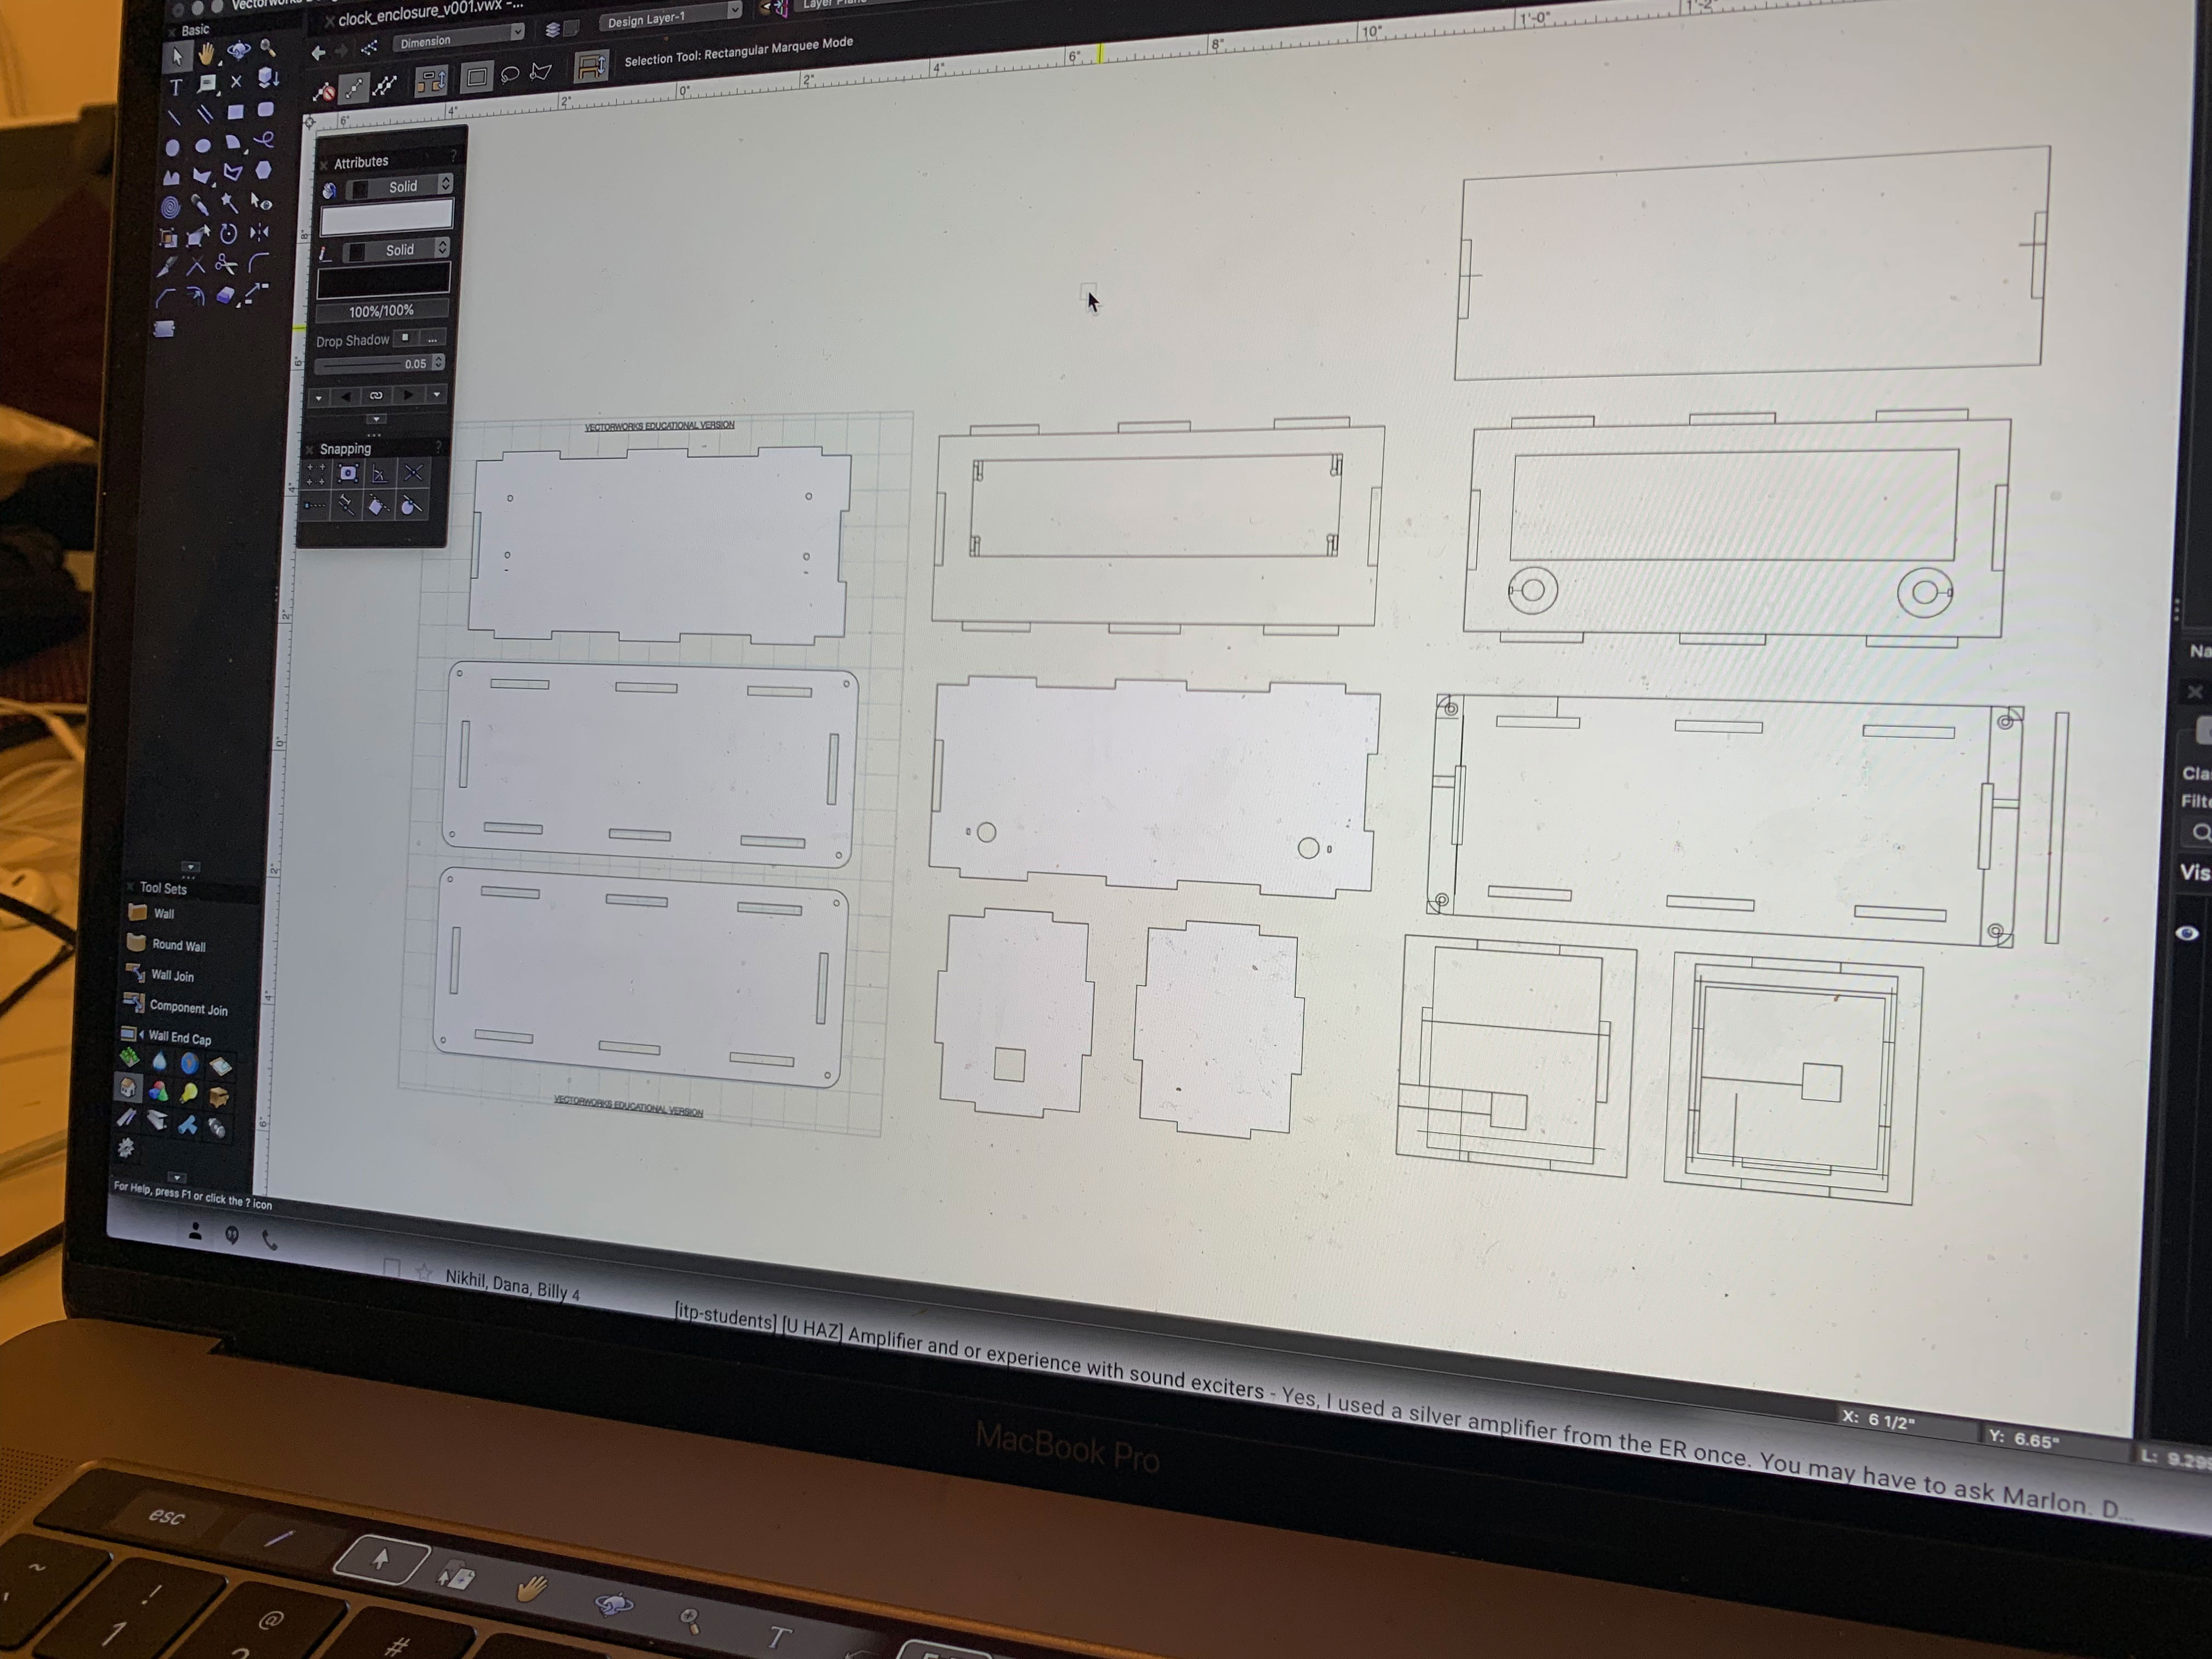
vectorworks layout
I laser cut a few cardboard prototypes getting some spacing and hole sizes worked out.
After Which I was ready to laser my final materials.
Things moved a quickly and I had some extra time so I was able to stain my wood panels. The stained panels paired with the white face and brass standoffs really looked nice.
Issues
Conflicting dot matrix libraries. Sorted by giving up certain features.
Spacial issues with the rotary encoders and the dot matrix. In side the enclosure things got pretty close, but I was able to make it work.
Using the googly eye example code and having the animation work when I change clock modes. I had to adjust the order of commands and place certain parts in the loop and in the respective function.
And last but not least, one of my dot matrices died right as I was finalizing my enclosure. Argg!!! A replacement is supposed to be delivered by 9pm tonight. Fingers crossed…
Minus a few hiccups, everything came together pretty nicely. I’m happy with the final product and I even think my wife will allow it to be on display in our bathroom.
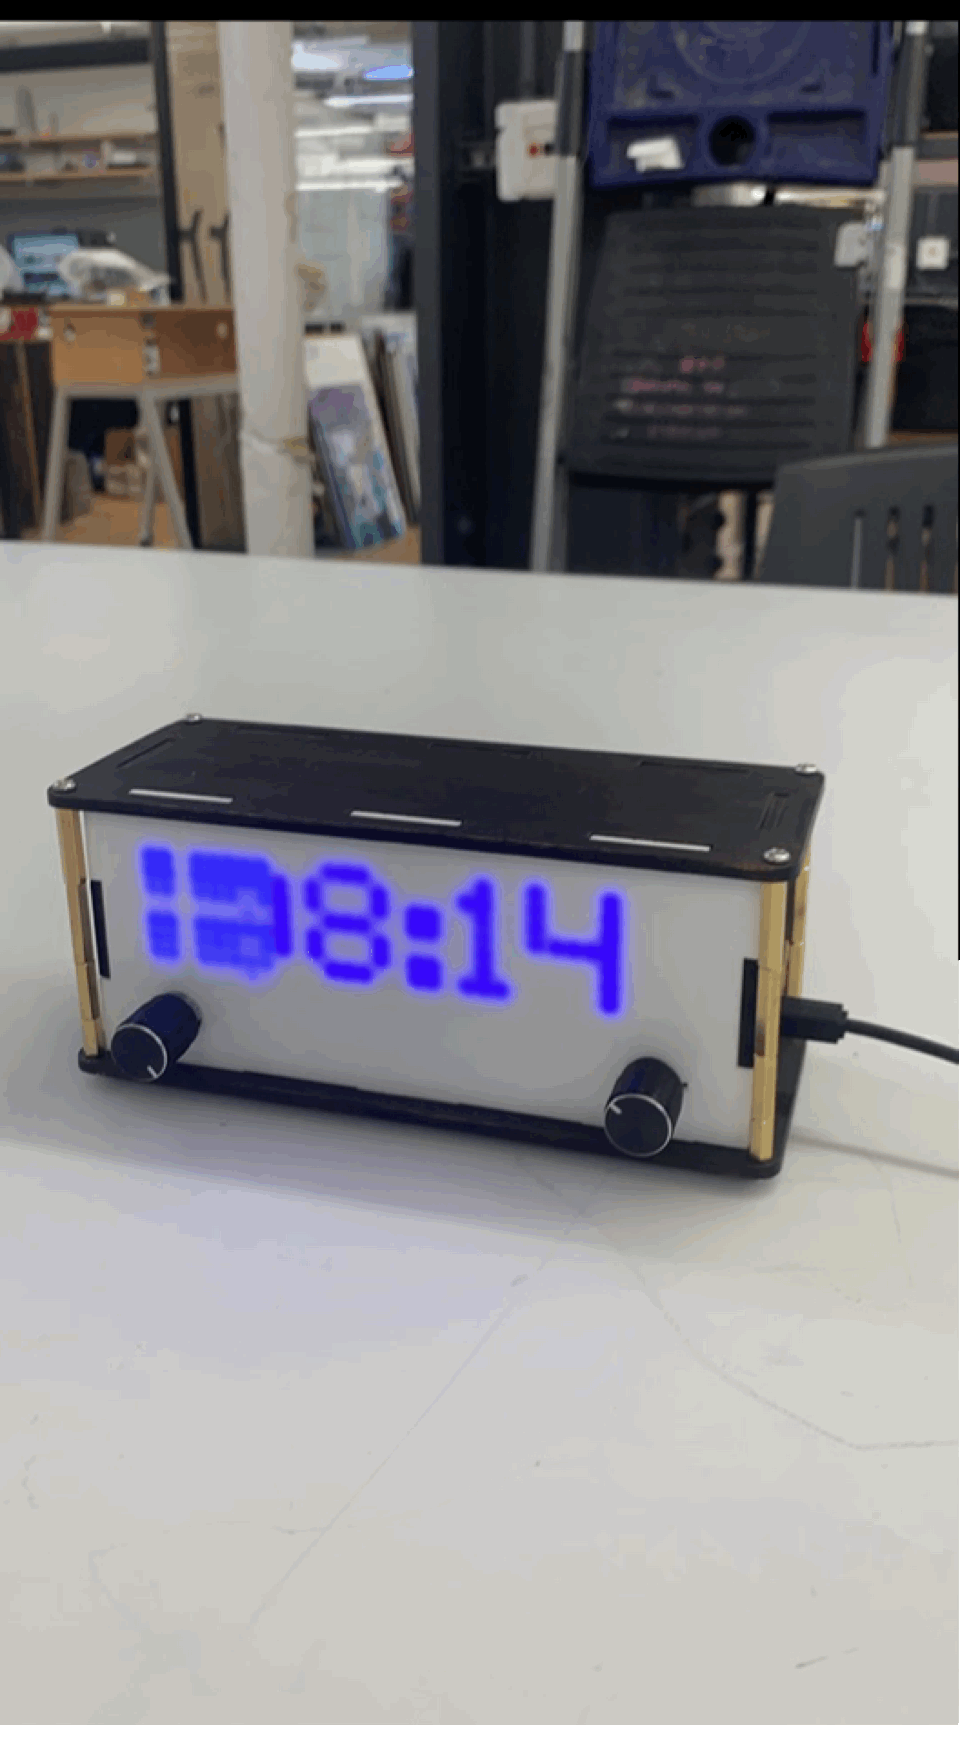
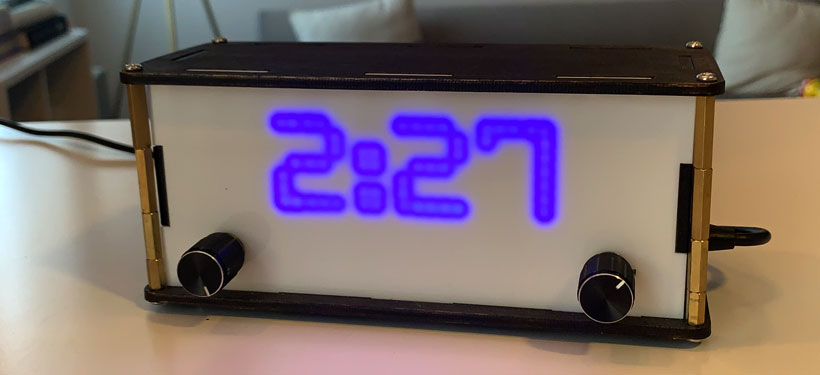
Final Clock - with a busted eye


