Bob The Ghost Pcomp Midterm
24 Oct 2019 - Jake Sherwood
 Bob Lives Free Candy
PCOMP Midterm - Bob Lives - Trick or Treat??!?
Picking up where we left off…
Bob LIVES! But it wasn’t easy.
We thought we had a relatively simple concept to execute. It turned out a little different.
We got some great feedback from class and had a few more things to work out. We thought we off to a good start and we should be able to implement these new features relatively easy.
Three days, 3 audio libraries, and 2 servo libraries later we realized we were wrong..
One suggestion from class was to add more sounds to draw the viewer in. We thought this was a great idea.
Our plan was to have an array of wav files stored on an SD card. It seemed easy enough and Zoe even had a MKRZero Arduino with and SD card built in.
Together we got the code sorted out for the audio play back from the MKRZero. After which I searched around for more spooky sounds.
We needed to cut them down to single channel audio and Zoe figured out how to do that with the Audacity.app.
Zoe also worked on making “Bob” more spooky… which I think she succeeded in doing. YIKES!
 Bob the ghost is scary
We had the ghost, the audio tracks, most of the fabe, the basic servo code, and the audio code pretty much done.
When we went to put things together thats when things started going haywire.
The audio library we found for the MKRZero was Audiozero.h. It had some really easy examples of how to get up and running but had limited functions of only begin, play, and end.
This presented problems trying to start and stop track based on sensor readings and when we would be showing the ghost or not and needed to play ghost sounds vs the spooky resting sounds.
After wrangling with that for a bit with no solution. I decided to look around for more audio libraries.
Tom Igoe has a lot of great example code for the AudioSound.h library. But the majority of them worked with I2S MAX98357 amp. I ordered one but we needed to keep looking.
Eventually we found the TMRpcm audio library which seemed to have all the methods we needed built it.
We got it added and after a few hours had it working mostly the way we wanted.
We tried to add it to the servo code and… of course nothing worked.
Bob’s possessed
We went back to the individual sketches and everything worked but it just didn’t function the way we wanted to when we had all the code in one sketch.
Luckily the I2S amp had showed up so I figured we’d give that a shot.
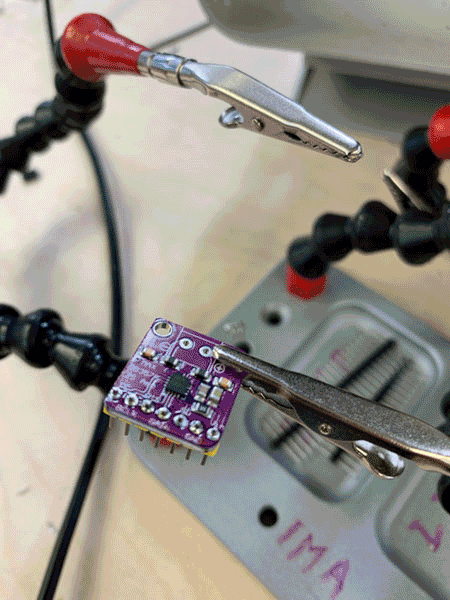
I soldered it up, wired up a circuit and tried to run some example code… nothing… ugh.
Back to the TMRpcm library…
It was really weird how everything worked individually but not together.
We started addeding Seriel logs, delays, and re-ordering the code. But nothing was helping. We would get either servo stuff to happen or audio but not both.
Eventually after extensive googling I found that there was actually conflicts with the TMRpcm library and Servo.h. The both used a built in timer function that was conflicting and couldn’t do both tasks at the same time.
Others had this issue and there was a sopposed solution of uncommenting out a line in the pcmConfig.h file. We tried that, didn’t help.
Time for more googling.
We found another servo library that supposedly would work, ServoTimer2.h.
Loaded it up updated our code, still had issues.
The angle values for the servo had to be different, which was easily resolved but on top of that it would make it through on cycle and get stuck. I could break out of the loop by calling the stopPlayback() function but it wasn’t really what we wanted.
After 3 days of pulling our hair out, multiple Arduinos, sensors, and circuits we decided to scrap the Arduino audio and just do it on p5.js.
multiple boards, sensors, and circuits - bob prototype boards
It was painful to let that go after so much time invested but we needed to move on.
Zoe got the p5 code working and together we got the serial connection up and running in record time compared to the time spent trying to do in on the Arduino. We didn’t really want to have to have a computer at the staging area but such is life.
The majority of the fab was done, coding was done, we just needed to do some final tests and get the last bits together for what we needed to stage it.
In between scrapping the SD audio and getting it to work on p5, I had the idea that we should add an additional small servo to make Bob’s head shake when he jumps out at you. I also wanted a servo for the arm that had more torque. So I was off to Tinkersphere for some more servos.
The small servo worked fine but when I wired up the higher torque servo Bob went a bit crazy.
Come to find out the servos rotated in different directions!!??!
high torque servo rotated in a different direction
Not a big deal we just had to attach it in a different orientation and stage in a different direction then originally planned.
We needed some longer spans of wire, I had the great idea to take some of the cable of the junk shelf cut it up and solder some headers on. I kinda thought it probably wouldn’t be worth it but I had already started.
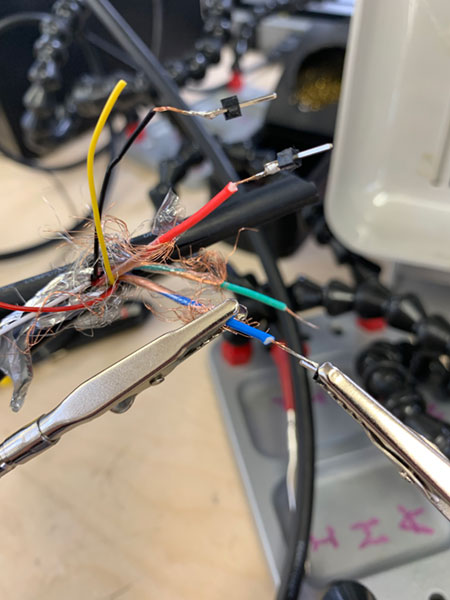
found wire soldering header pins
It worked out and helped me improve my technique for soldering frayed wires. And we had the span of wire we needed.
Putting everything together for a final test at our work station and it seemed to work…
high torque servo turned in a different direction
Adding the micro servo to the move the head was a nice touch and added a lot more “life” to Bob.
One additional thing we had added was a counter weight to try to make Bob and the arm not so droopy. It helped but we probably could have used more weight.
Zoe worked on cleaning up the stand and taping up the counter weight so it wasn’t shaking everywhere and we were ready to stage.
After so much turmoil in this project I was scared to move it, but it need to be in the corridor.
We found our preferred location got everything set up and of course it didn’t work.
We were having some wiring issues so we worked to rewire everything a bit better so they didn’t stress the connections… still nothing.
I tested continuity and power for the long span of wire we had going to the sensor. Everything checked out but it still didn’t work. After fiddling for a bit and having no success I decided to just swap out the found wire I had used. Turned out soldering all those header pins wasn’t worth it.
New wires fixed the problem and everything started to work…
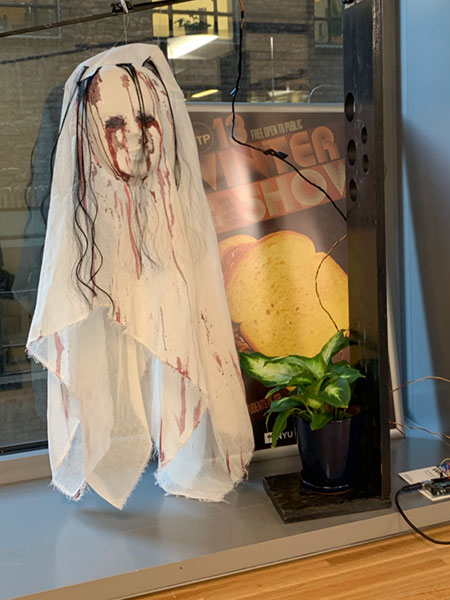
Bob was alive!!!
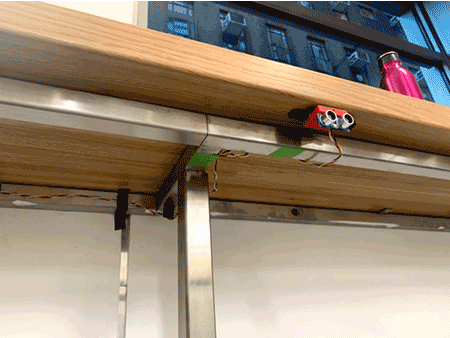
We snaked the wire between the windowsill and the table and placed the sensor under the table to be less visible.
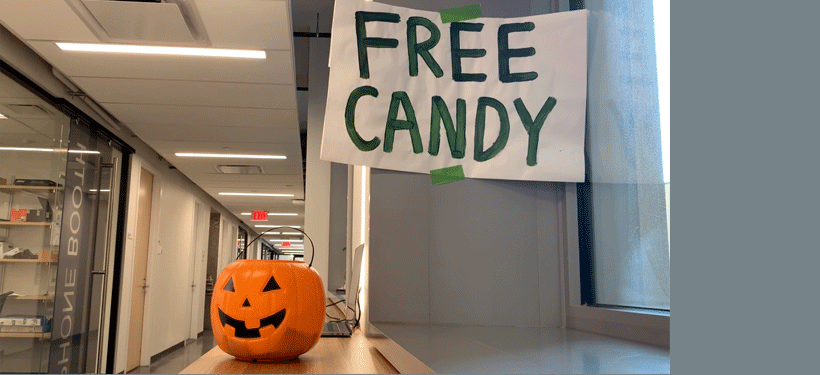
We were also still having some inconsistency with the ultrasonic sensor reacting. Zoe had the great idea to put a bowl of candy with a sign reading “FREE CANDY” above where the sensor was. This would entice the user over to a specific spot and hopefully we could get a more accurate reading. I thought it was a great idea and it ended up being a great addition.
Final Staging Images

bob the ghost hiding
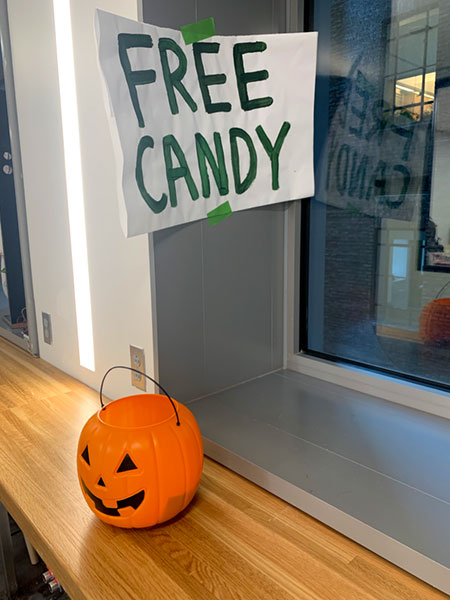
free candy trick or treat
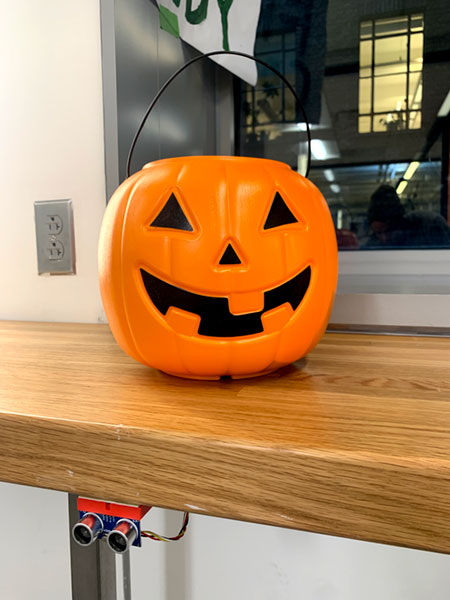
free candy sensor placement
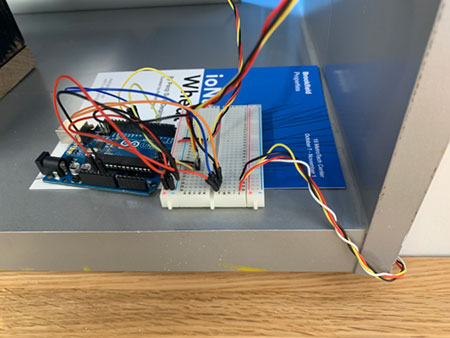
final arduino layout and circuit

snaking wire through table
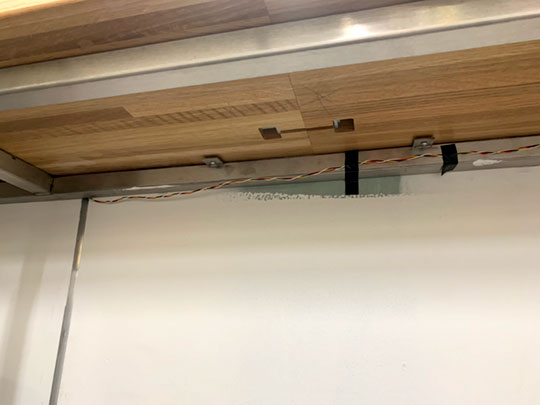
wired under table
wired under table - sensor
Bob Lives - User Tests
Bob Lives and Scares People