Two Materials
08 Oct 2019 - Jake Sherwood
Use Two Materials - Spinning Tops
Intro to Fabrication WEEK 5 - Use Two Materials - Spinning Tops
The assignment for this week was to use any 2 materials with the exception of plywood and acrylic.
Inspiration
Continuing the theme of things for my son, I had wanted to make / buy a spinning top toy for Jackson for a while. Figured this would be a good opportunity to try to make one… or three.
I also looked at a few links for how to work with cork and get my general shapes started.
Easy way to make a cone
Finishing cork
cutting brass circles
I sourced most of my materials from amazon this time. Primarily using cork and brass.
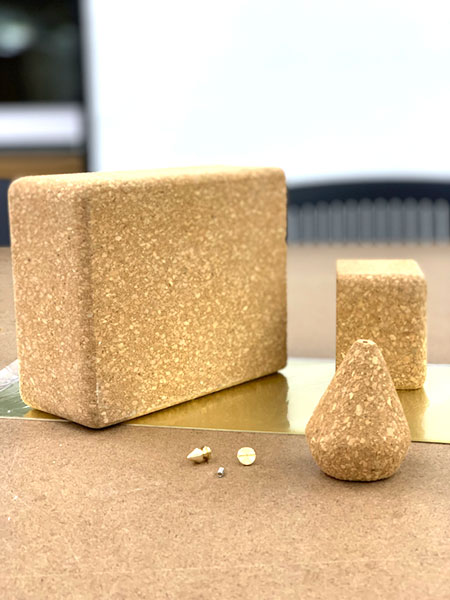
cork and brass materials
Materials Used:
cork
brass sheet
brass rod
brass weights
brass knobs
brass studs
gorilla and hot glue
stain and clear coat
Process:
My initial idea was to do the traditional cone shape top. I knew I needed to start with a cone shaped block and the youtube video above helped me work out a method to do that.
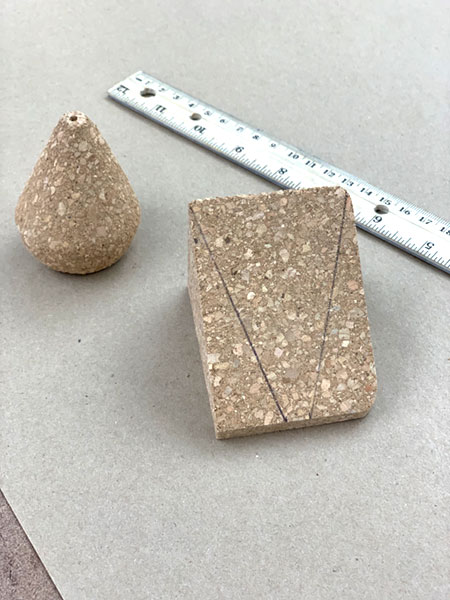
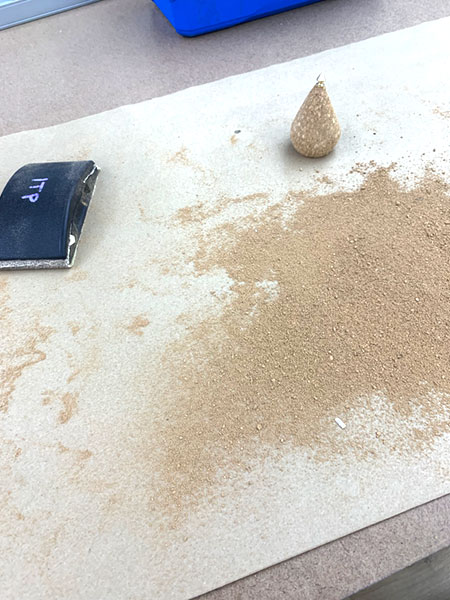
My cork material was from a cork yoga block and I started by using the miter saw to cut my initial block to a size I wanted to work with.
I then measured the width of the studs I planned to put on the tip. From there I drew diagonal lines to the corners.
I used these as guide lines on the belt sander to get my initial cone shape started.
making cones out of cork
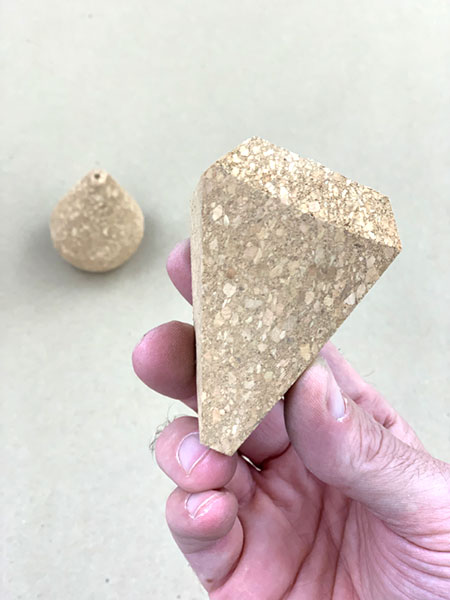
Once I had my first 2 sides sanded I remeasured and drew guidelines for the other 2 sides of my cone.
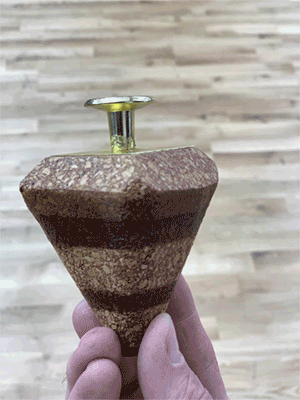
I also bevelled the top to create a kind of diamond shape.
diamond shape vs round
To finalize the shapes I used sandpaper, a Dremel, and sanding blocks to get the shapes I wanted.
sanding cork
I actually couldn’t decide between round, square, or a combination of both so I did 3. One of which was my prototype but I ended up finishing it out with others.
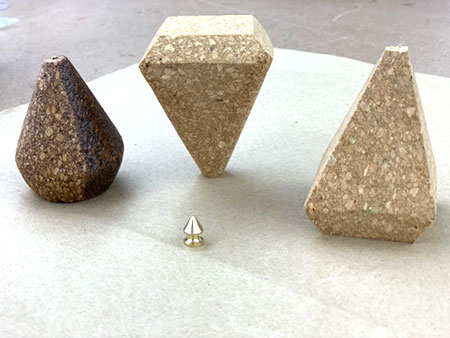
cork tops 3 shapes
After having my shapes mostly together, I came upon my first major hiccup… cork is WAY too light.
There wasn’t enough weight for them to really spin at all.
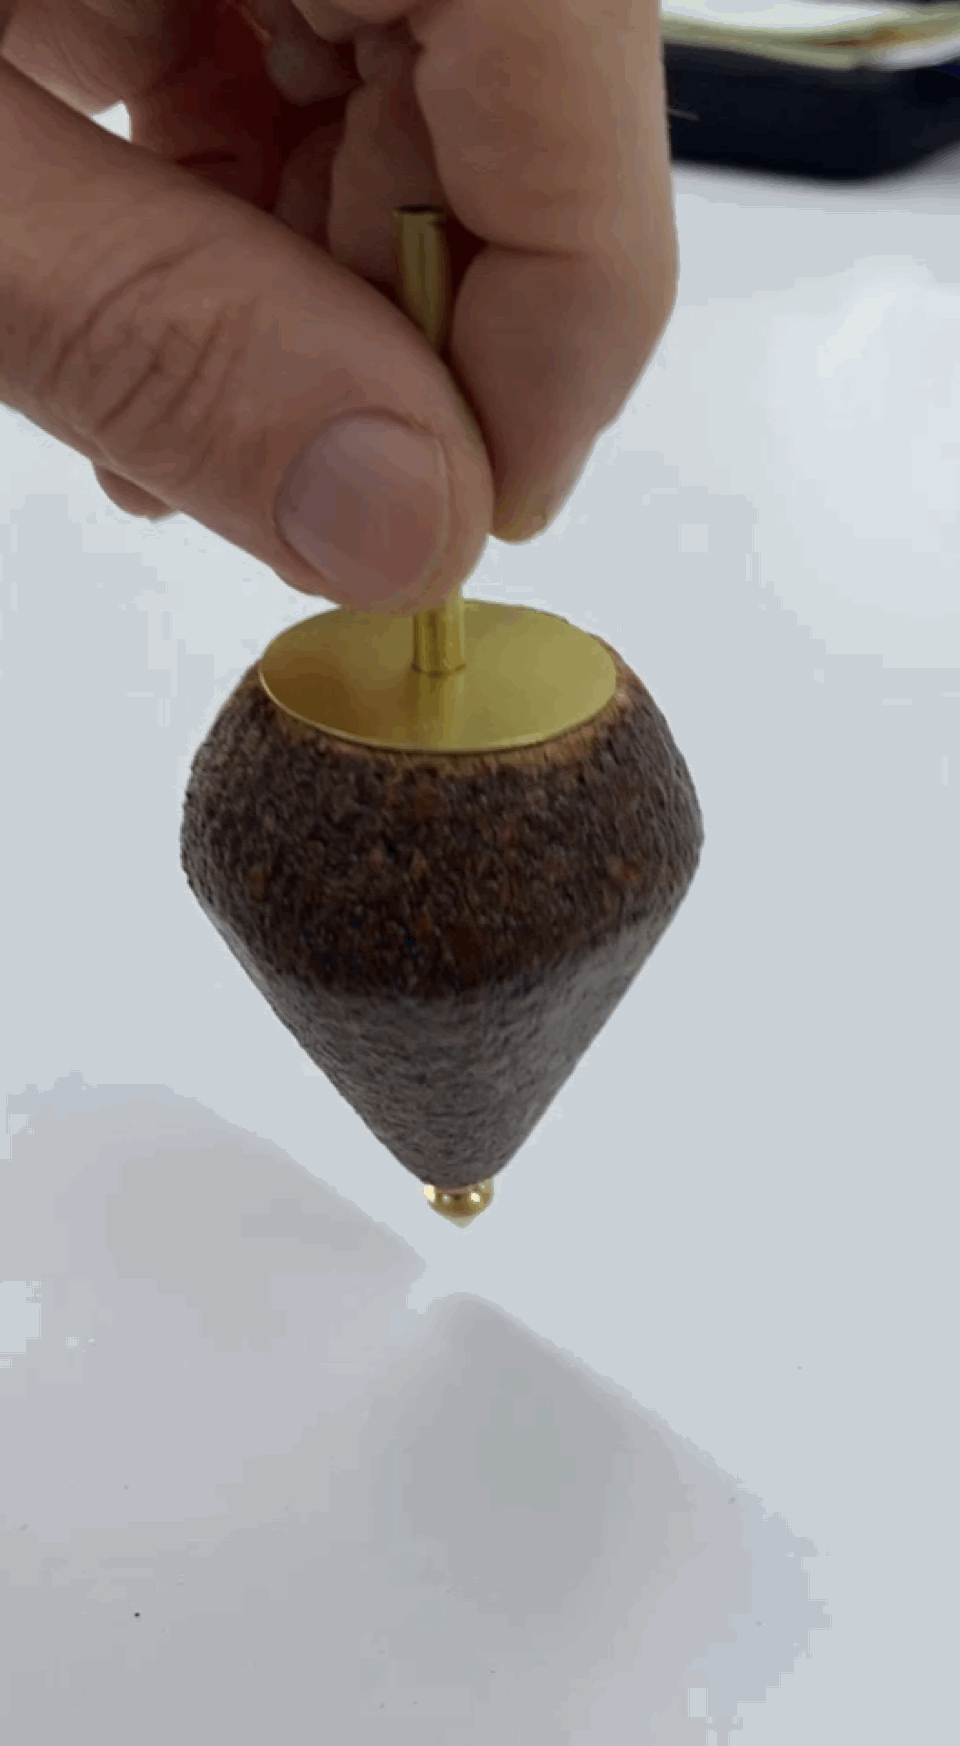
My solution was to drill holes and add some brass weights.
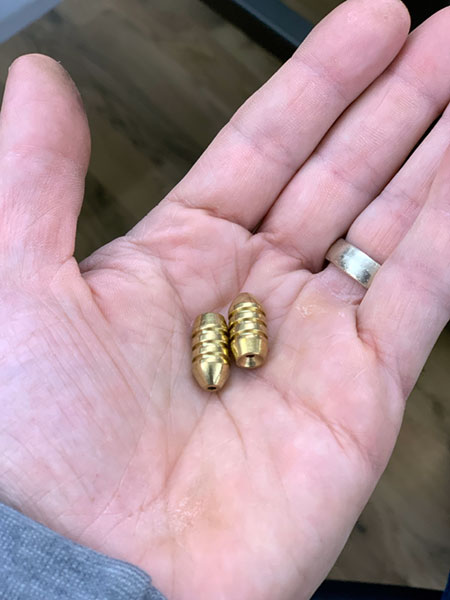
adding brass weights
This helped things but unfortunately they still weren’t / aren’t great spinners. They still look cool and may work in low gravity lol.
To change the look and feel of each piece I did a different stain treatment. I finished all 3 with clear coat and different brass elements.
One of my original plans was to inlay brass circles in-between the cork. That idea kinda went out the window when I realized I had to add weight, but I still wanted to figure out a good way to cut shapes into my brass sheet.
Ben gave me a quick tutorial on the Othermill metal CNC and I was off to making clean simple shapes out of brass. It was pretty cool and I look forward to using the Othermill more in the future.
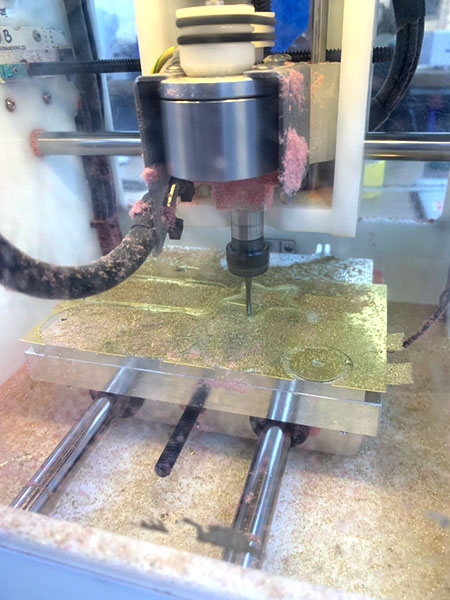
cutting shapes in brass with Othermill
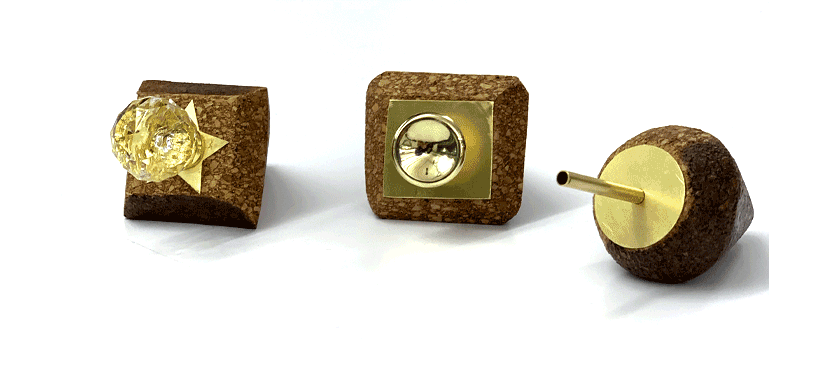
I did end up using a few of the shapes on the tops of the tops. So I was happy about that.
I added different brass treatments to each top. I used the Othermill shapes, brass rod, and brass pulls.
Final Ornamental Treatments
multiple tops
Spin Tests
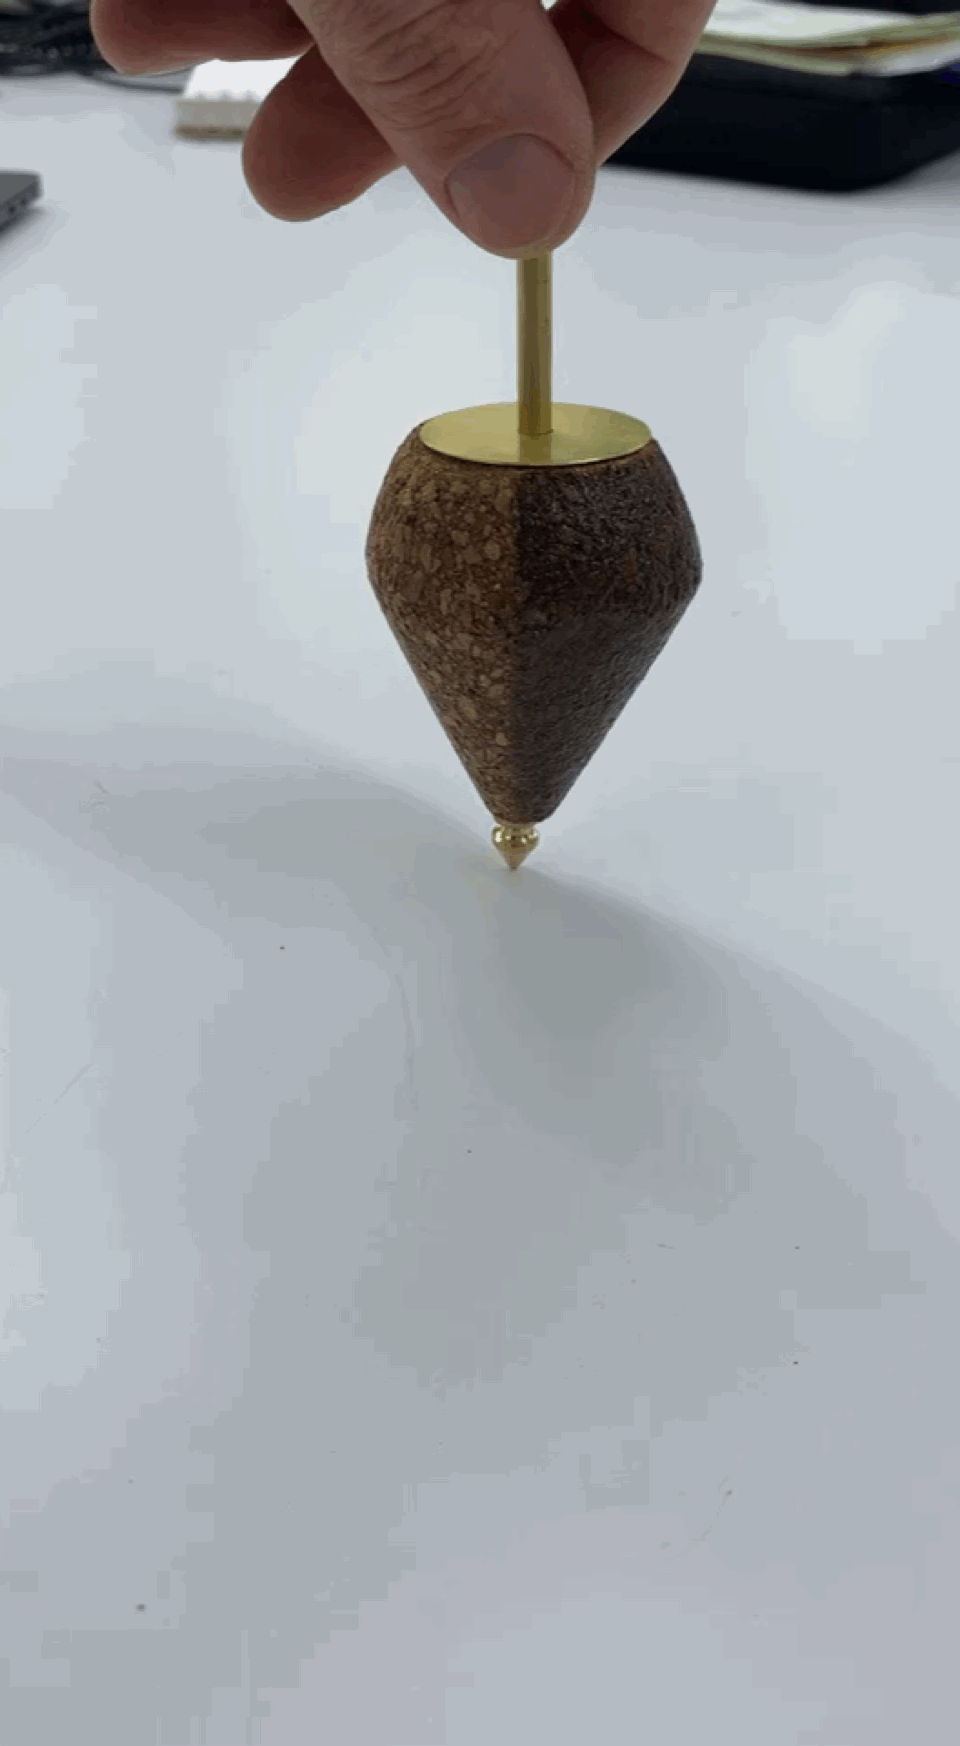
spinning top test fail
spinning top test fake
Final Tops
Use Two Materials - Spinning Tops
Even though they don’t work well as tops, I am pleased with they way they look and material treatment and exploration.
In the future I may create an offset hanging piece with the three tops.
Back to the drawing board and/or store for a top for Jackson.