Kimagnet
15 Mar 2021 - Jake Sherwood
 Kimagnet
Kinetic sculpture
Kimagnet
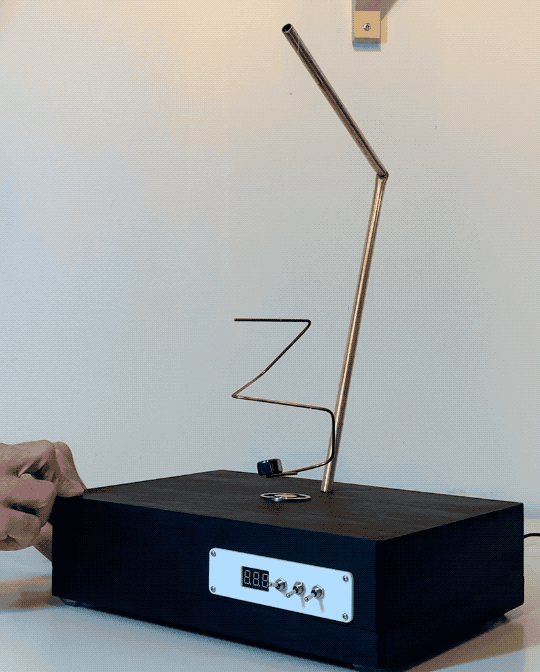
Kimagnet is a kinetic sculpture that explores energy, magnetism, and movement.
Inspired by artist like Ivan Black, David C. Roy, and Takis, I’m interested in shapes and movement.
I wanted to experiment with harnessing kinetic energy and creating movement with different shapes.
An electromagnet at the center of the enclosure can be powered by crank or Arduino.
Turning the crank in the opposite direction will change the polarity of the electromagnet. Likewise when powered by the Arduino, an TB6612FNG h-bridge with toggle switches allows for changing the electromagnet polarity.
Toggle switches switch between crank or Arduino power driving the electromagnet, as well as allowing for toggling the current flow with the h-bridge.
The h-bridge is basically a series of 4 switches that can control the flow of current. When switched one way the curent flows in one direction and switched other the current flows in opposite directions. Most often used to control the direction of a motor it can also be used to control the polarity of an electromagnet.
I’m using a 12v 550rpm dc motor with a window crank to power the electromagnet.
I experimented with a few different motors and can generate about 5.2 -6 volts open circuit voltage from the crank just reading directly from a multimeter.
There is also a mini volt meter that works best under Arduino power. and sometimes depending on consistency of cranks will read out about 2 - 3.2 volts in crank power. I ended up reworking the circuit and now the meter only works on Arduino power.
Originally, when conceptualizing this project I was mostly thinking about the attraction of the hanging pendulum sculpture and the magnet. But I think the switched polarity and repulsion creates a more interesting effect.
 repulsion
Fab
I made a simple prototype to begin with. It proved very helpful throughout and saw a few iterations itself. Most notable learning, don’t make the frame / stand out of ferromagnetic material. Not the best photo but below you can see my sculpture kept being attracted to the frame.
 ferromagnetic frame
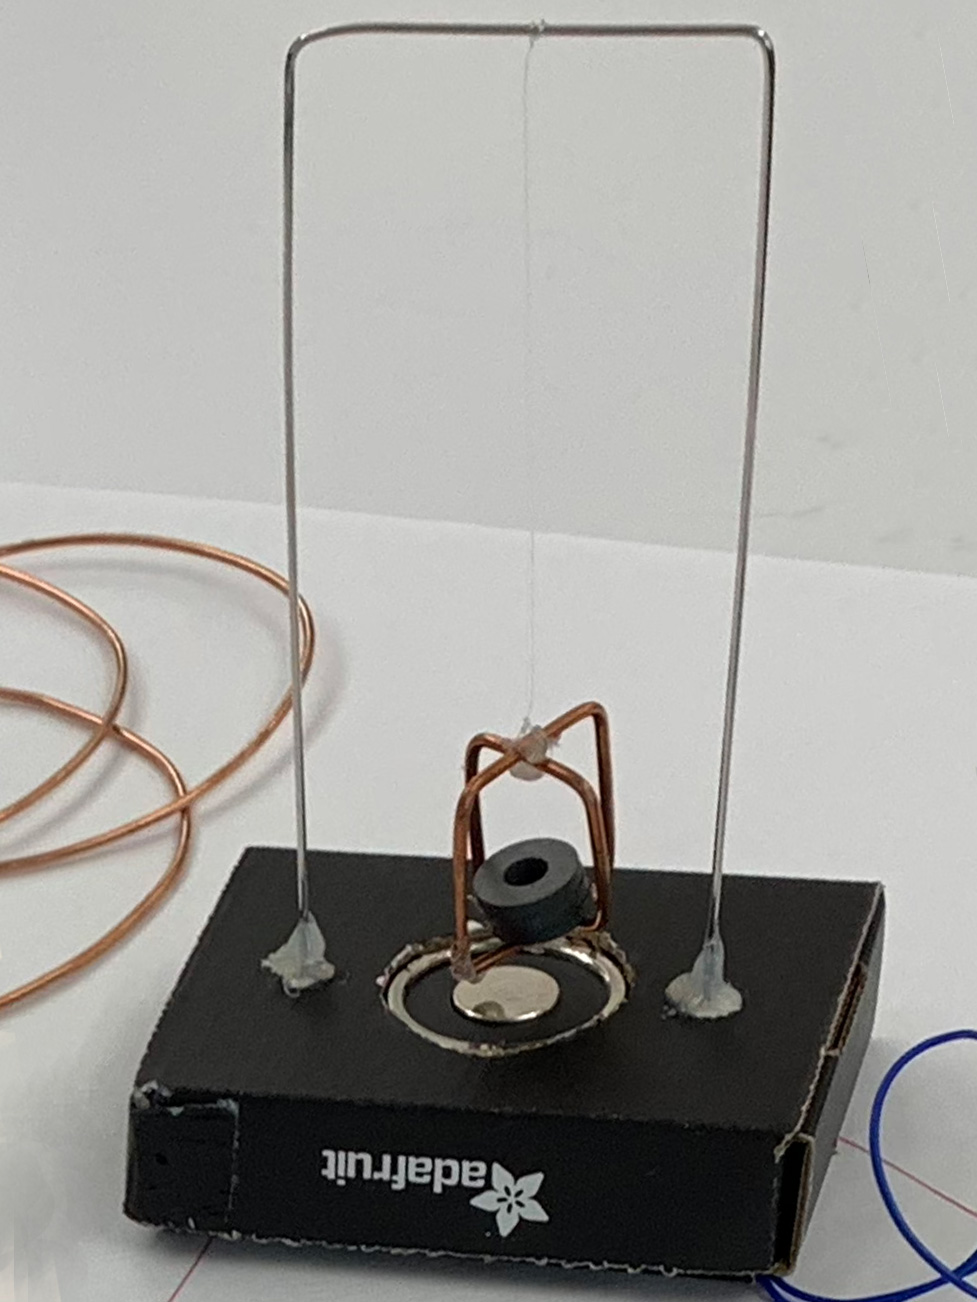 non-ferromagnetic frame
I redesigned the final piece to have one angled stem instead of the frame. This creates a much more dynamic aesthetic and reduces movement obstruction.
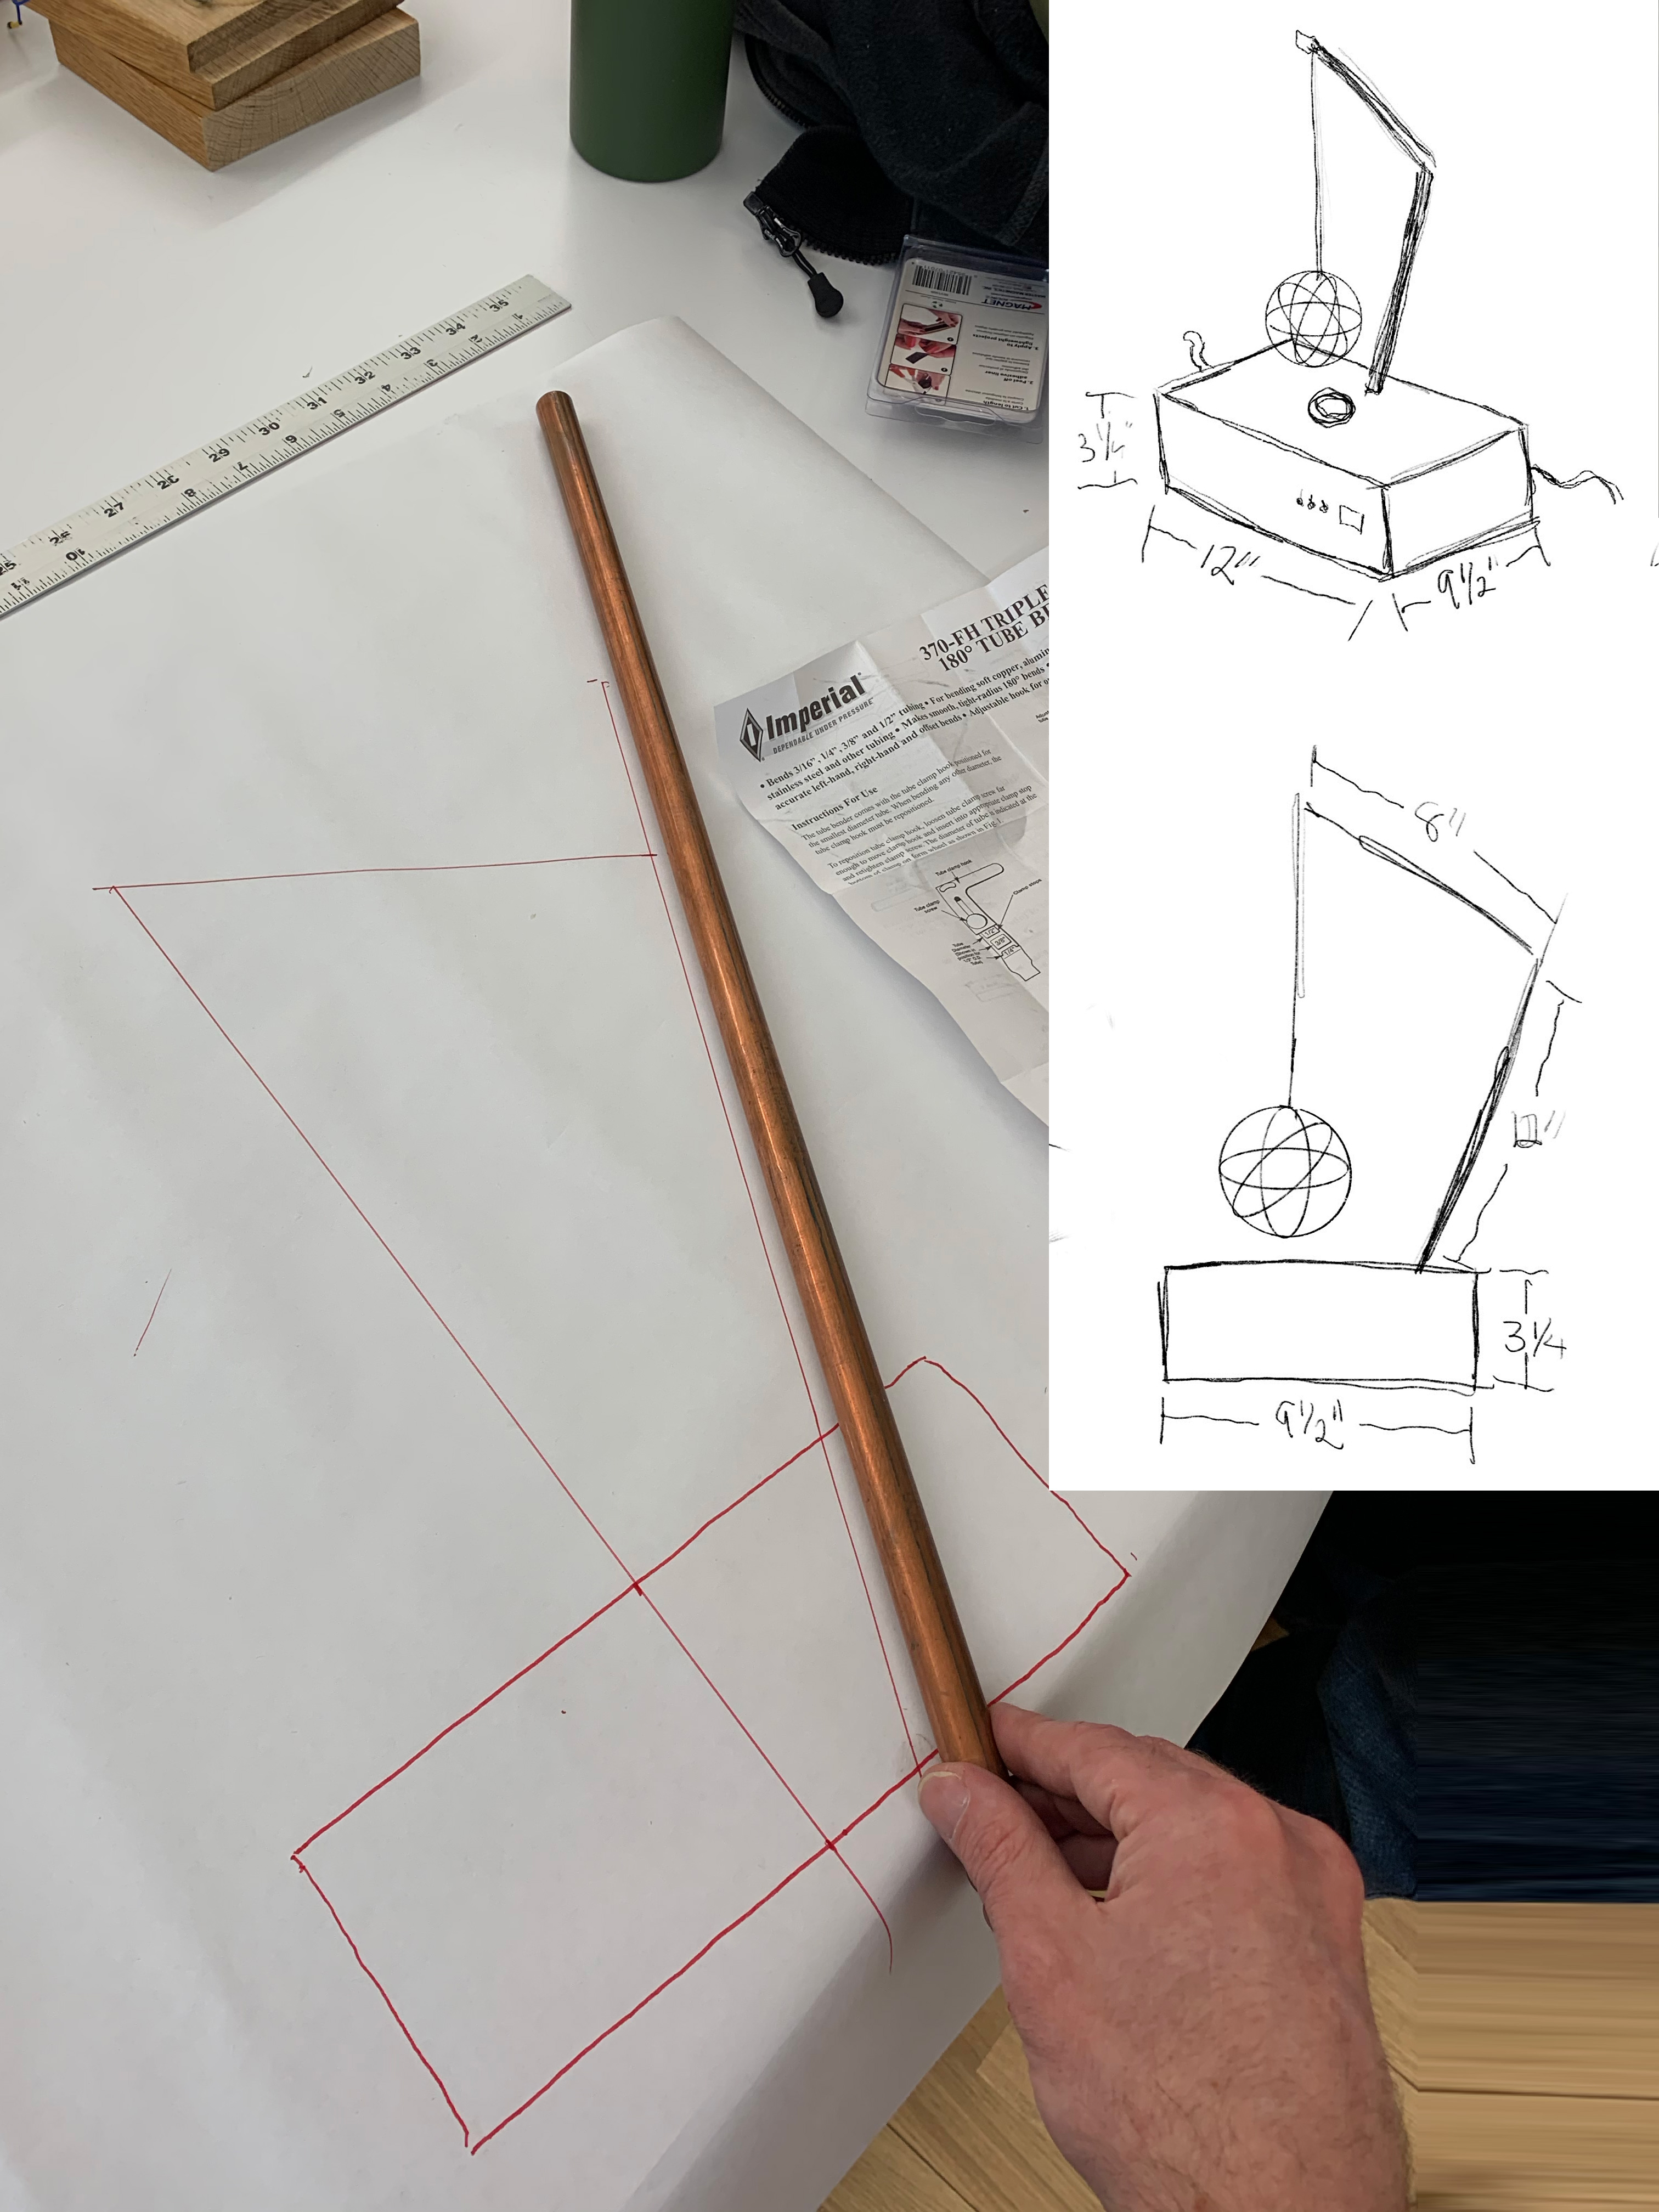 redesign drawings
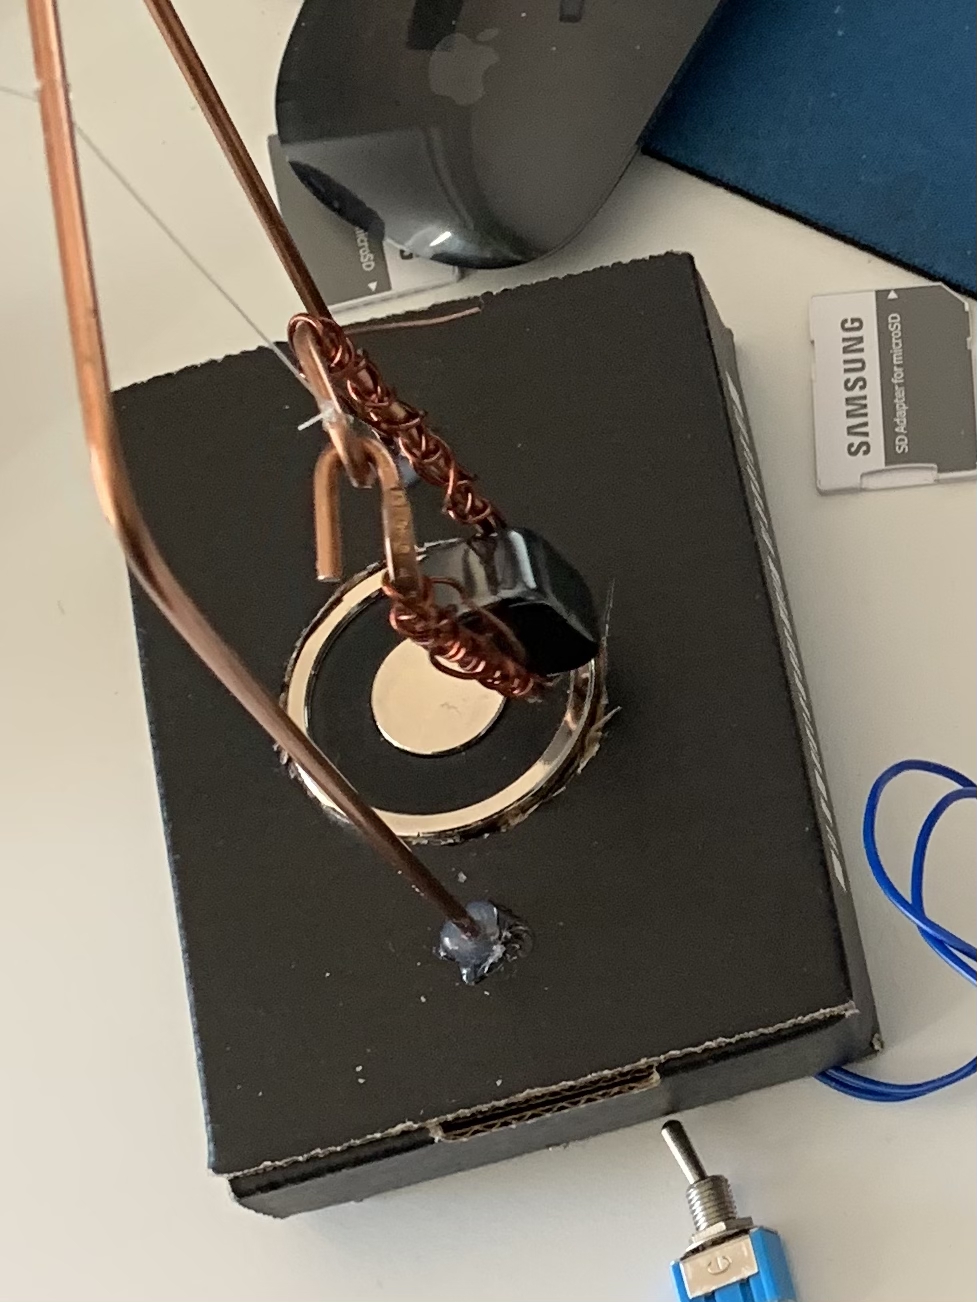
For the base I used a prefabbed box which I modified to house my motor, stem, and electronics. The box was stained and affixed with rubber feet.
At the great advice of Ben Light, I flipped the box upside down which allows it to still be openned and makes the electronics accessible.
Ben also suggested adding more support for the stem so a large wooden block was also added and I used the drill press to drill a diagonal whole through the box and the support block.
The block also served as an anchor point to secure the electromagnet to.
I also added a component panel to the front that houses my toggle switches as well as the volt meter.
I originally wanted to make my own electromagnet but after a few failed attempts and a good work out getting into a transformer, I ended up just using one I bought from Adafruit.
I experimented with a number of different shapes. Some worked better than others.
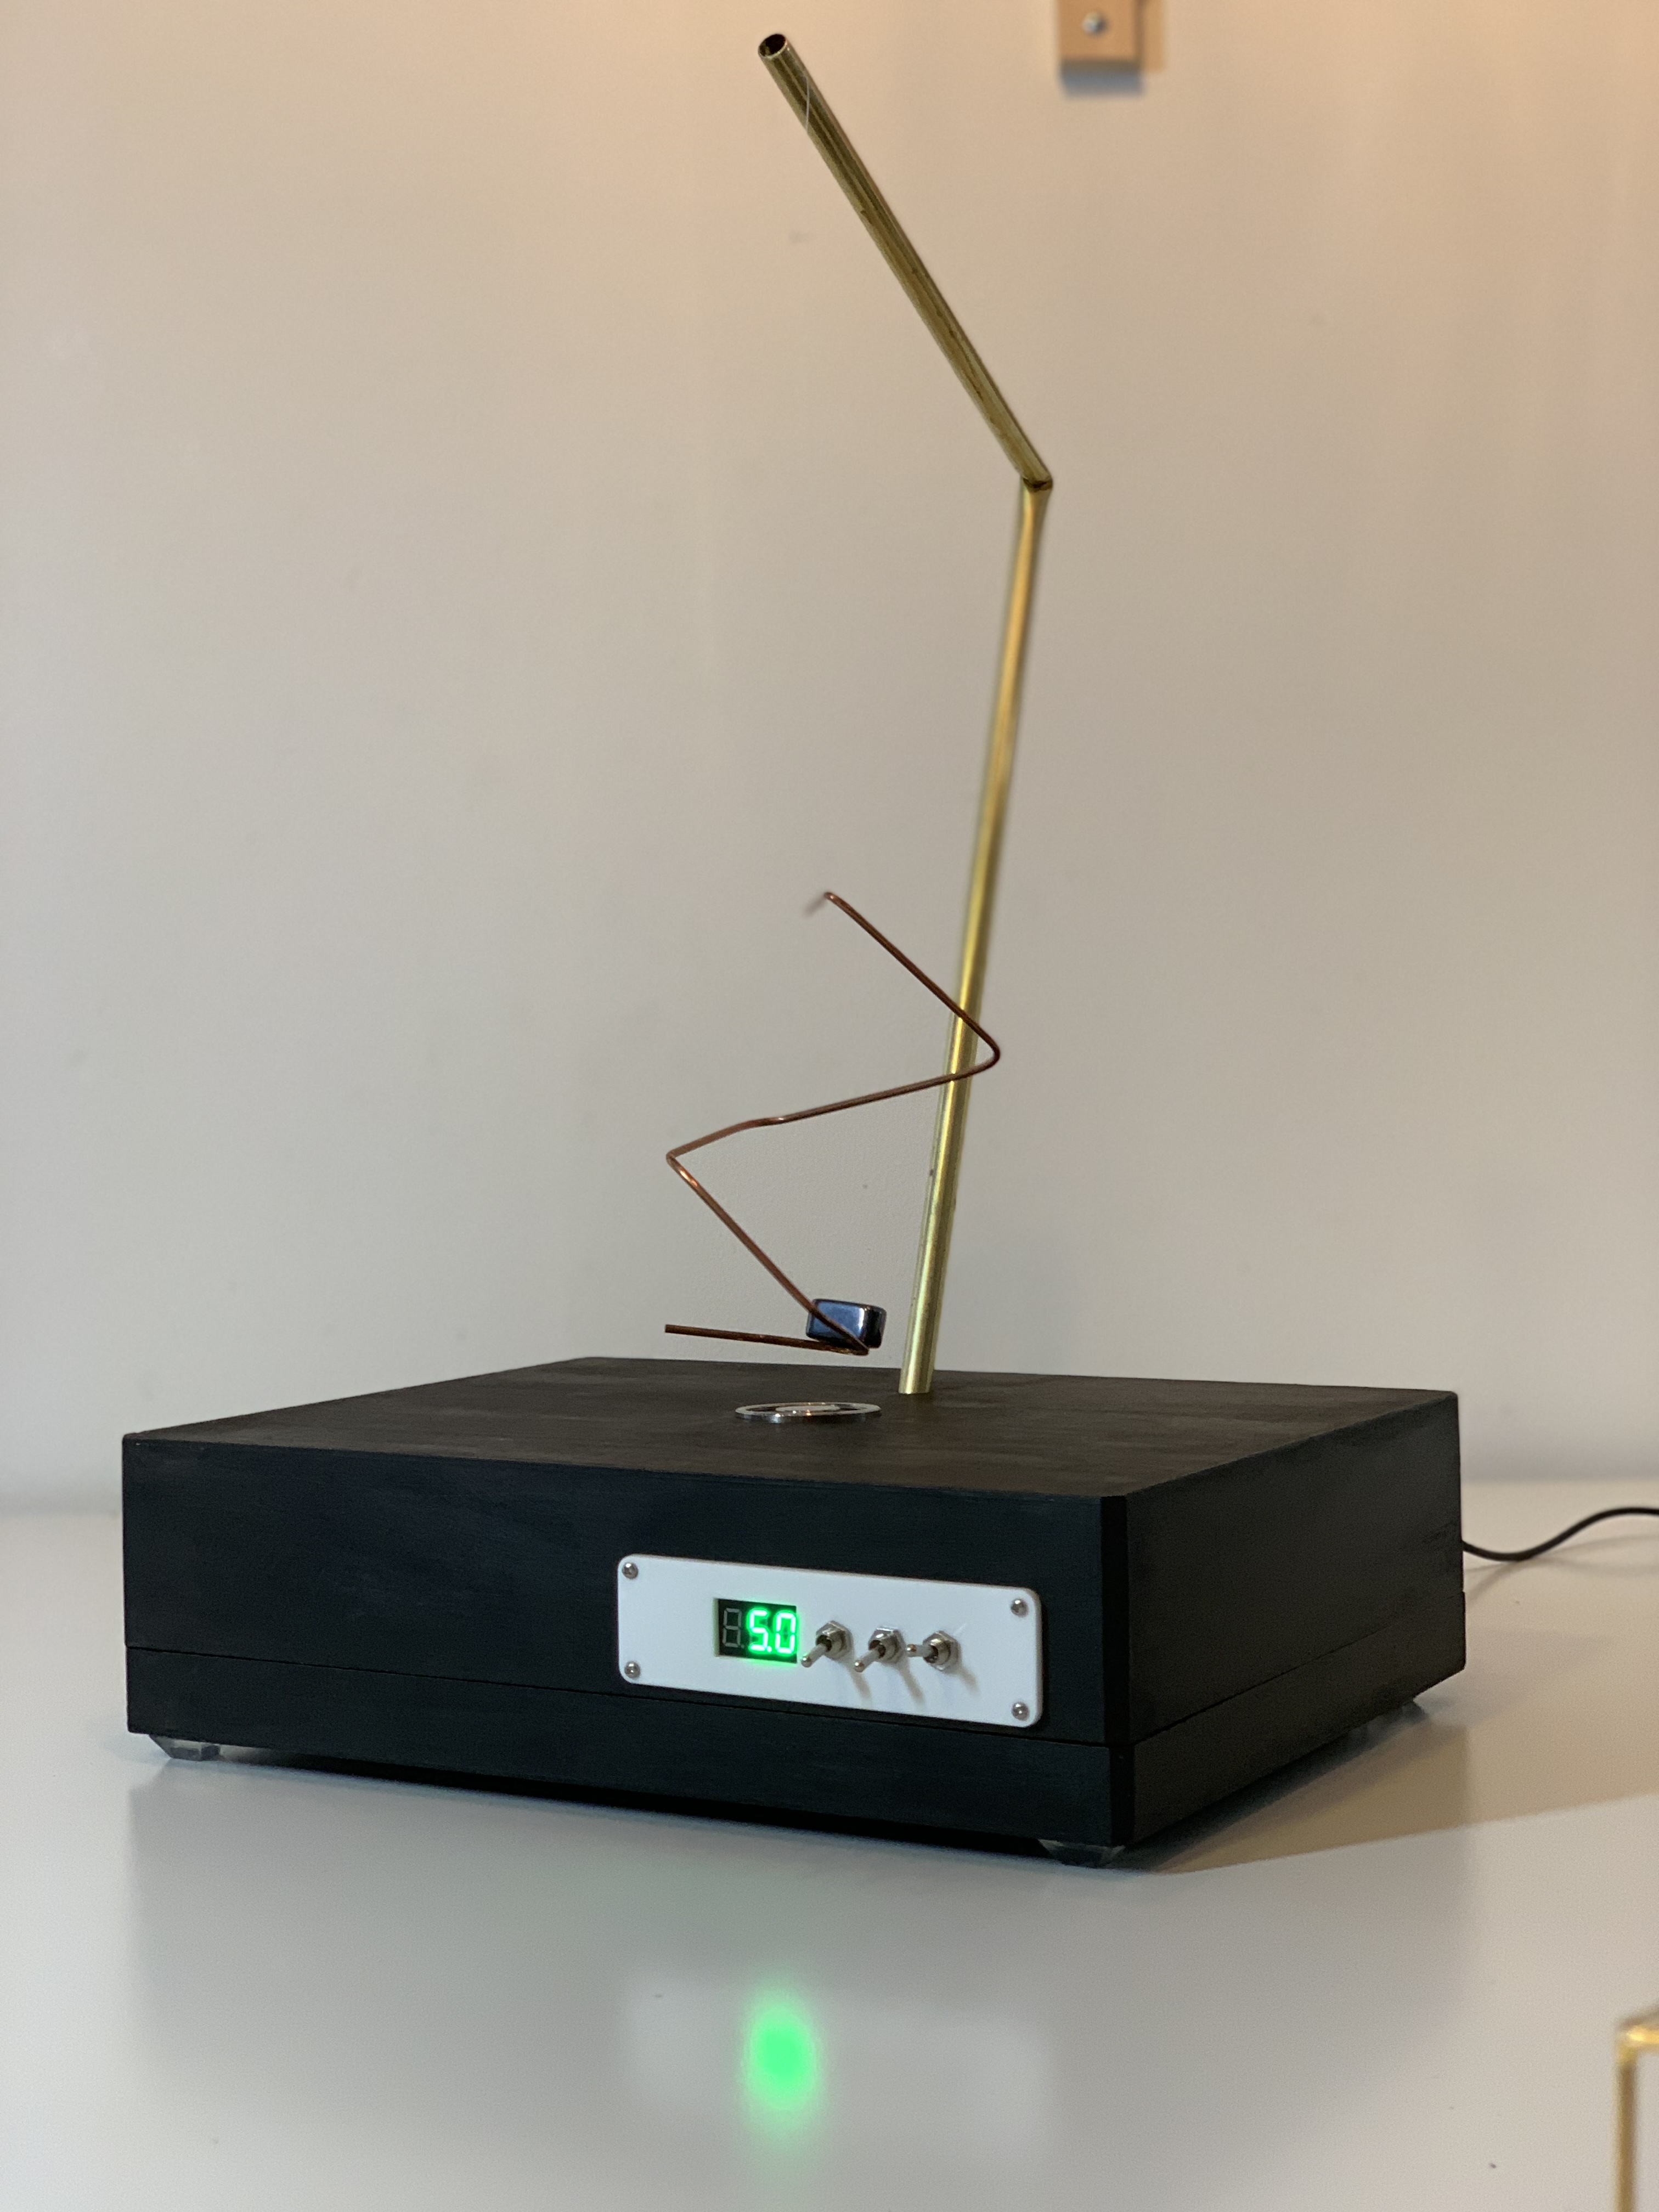 shape zigzag
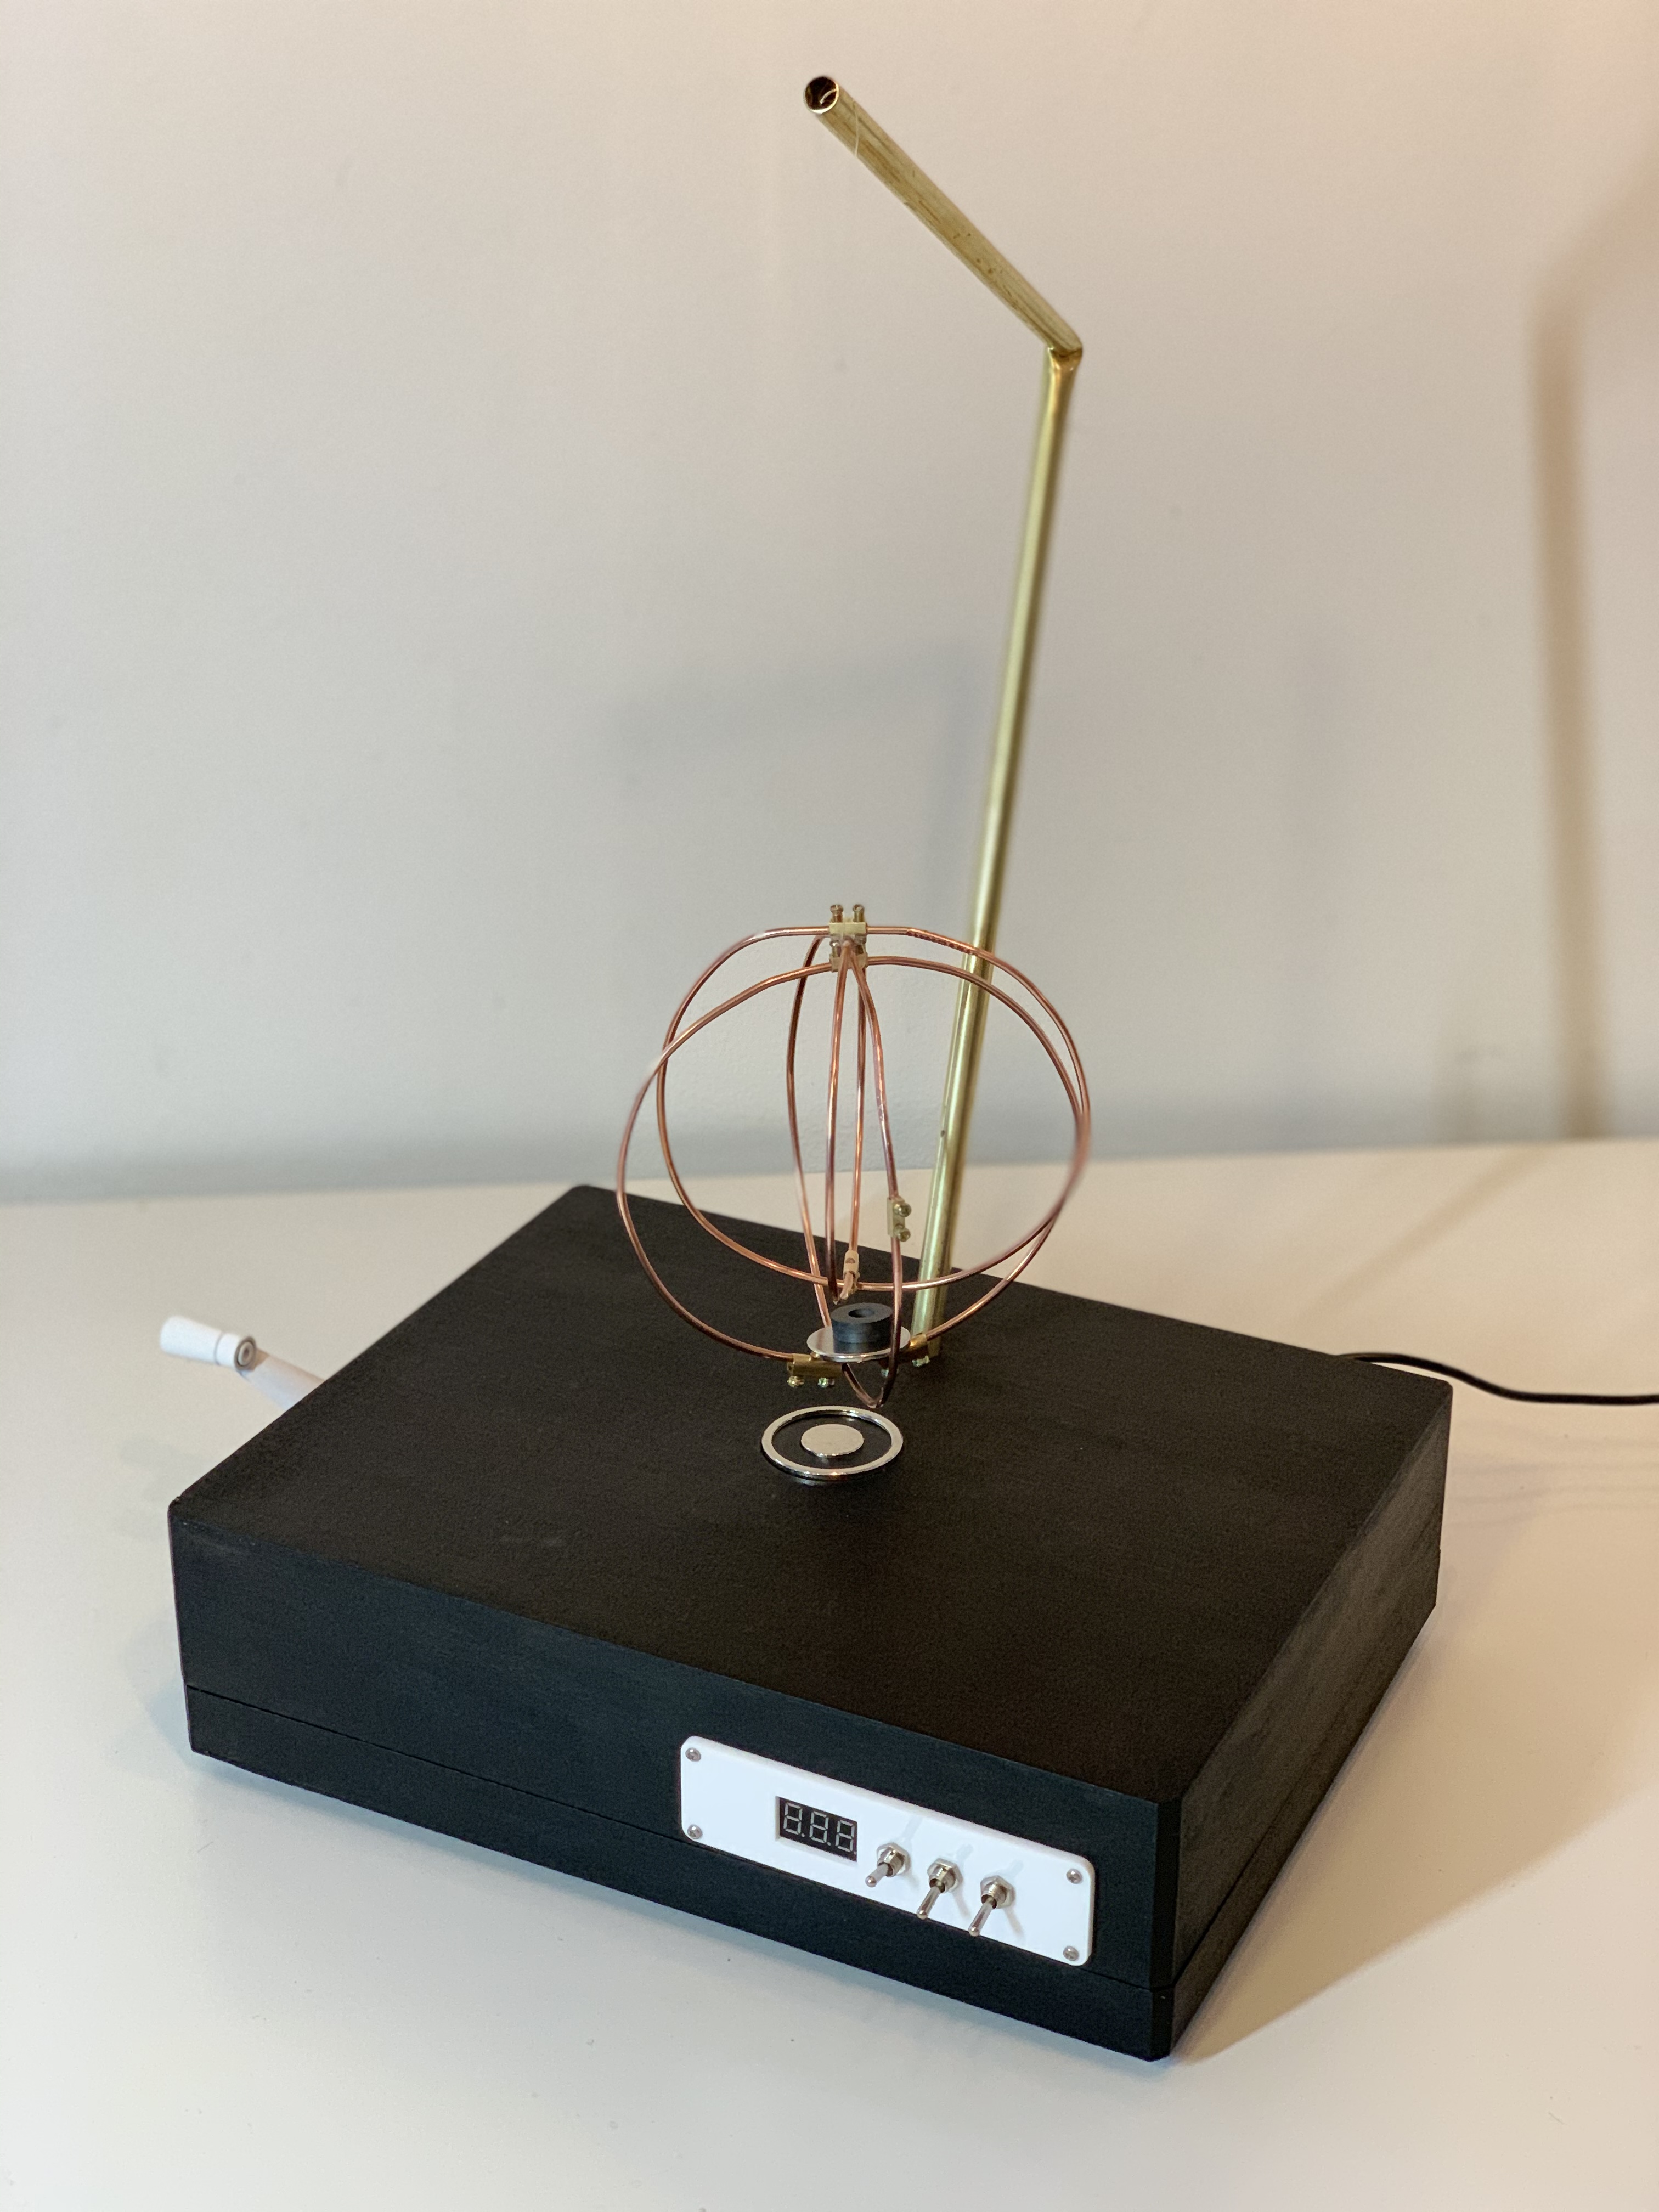 shape sphere
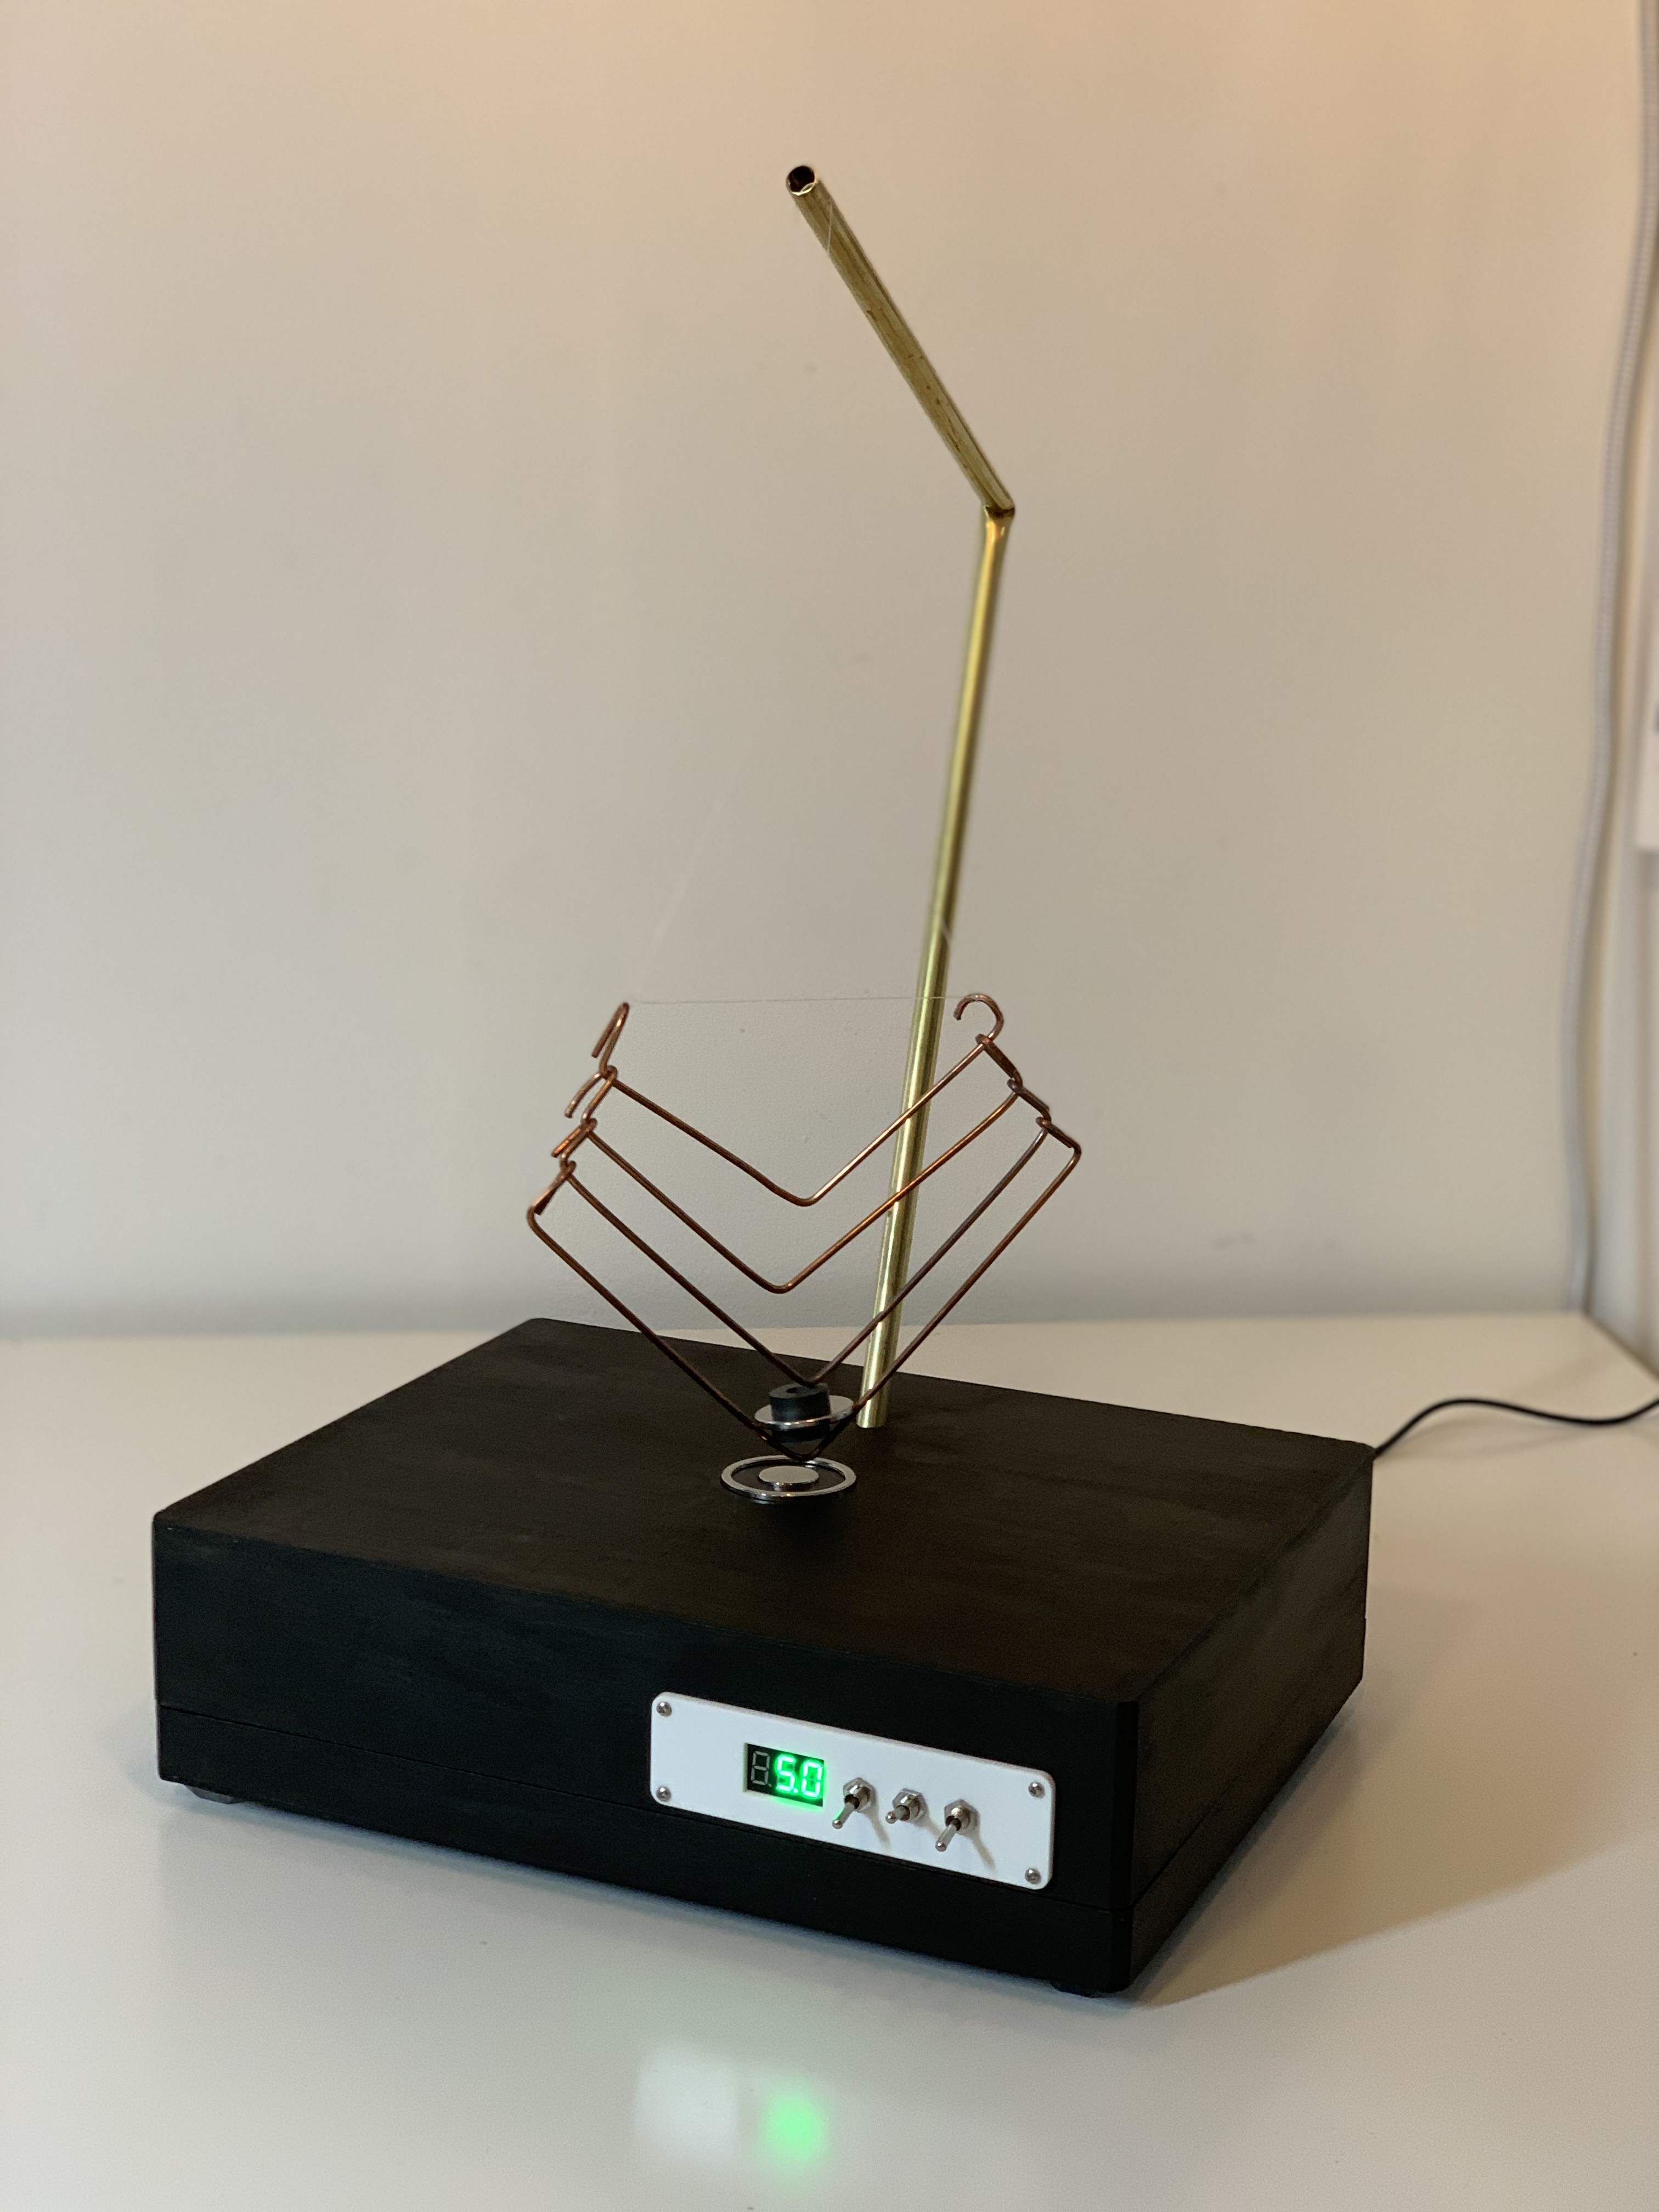 shape v
Challenges
Aside from the original prototype issue mentioned above I had a few more challenges.
1) I attempted to make my own magnets but was not successful. Not sure if the magnet wire I had was too thick but I could not get consistent magnetism.
2) I was having shorting issues. Which ended up be caused by sending signals from both the h-bridge and the crank at the same time. I added toggle switches to be able to enable and disable the connections.
3) Low Arduino power. Jeff noticed that my mini volt meter was only registering 3v from the Arduino. Which could have been due to a problem with the circuit. Ended up just being a crappy power supply. Switching to a different supply fixed the issue.
4) The box height is a little too low which makes using the crank difficult. Resulting in inconsistent power.
5) The stem material was a challenge to get right. The first material was too thick and Ben and I crimped it with the pipe bender. The second material’s walls were too thin and it also crimped. But it was still usable. Its currently friction fit so I could replace it with a stem out of another material.
6) Placing the magnets on the pendulum sculptures was difficult. Depending on the sculpture it required fine adjustments in order for the magnets to stay. Also they needed to be placed in the correct polarity for the controls to work the same for each.
7) Tying the nylon string that hangs the sculptures. Sizing this up to the correct hanging height took way longer than I care to admit.
8) Controlling polarity with Arduino. This for some reason still produces inconsistent results. I reworked the circuit based on Jeff’s suggestion and it seems like initially it works to toggle polarity, but after a few toggles it stops. I tried for a while to correct it but could not.
9) After adjusting the circuit to try to handle the h-bridge polarity, I could no longer get readings from the volt meter on both power sources. Not a big deal. The power from the crank was so sporadic it barely registered.
Code
The code is pretty basic. It uses the Sparkfun TB6612 h-bridge library and some basic logic to read a toggle input for switching the polarity. Code is here on GitHub.
Next Steps
Ultimately, I plan to collab with my mom, who is an amazing glass artist and create a glass globe with magnetic inlays.
I’d also like to move things to a proto board. Even with some wire management it’s still a mess in there.
Wrap up
Overall I’m pleased with how this project turned out.
I enjoyed exploring magnetism, movement, and using the kinetic energy of my body as a powersource.
Photo Gallery
 kimagnet_breadboard
 kimagnet_cutting_holes1
 kimagnet_cutting_holes2
 kimagnet_cutting_plywood_w_boxcutter
 kimagnet_cutting_transformers
 kimagnet_enclosure_back
 kimagnet_enclosure_front
 kimagnet_enclosure_front2
 kimagnet_enclosure_left_back
 kimagnet_enclosure_left_front
 kimagnet_ferromagnet_frame
 kimagnet_found_cube
 kimagnet_inside1
 kimagnet_inside2
 kimagnet_inside3
 kimagnet_inside4
 kimagnet_inside5
 kimagnet_inside6
 kimagnet_last_minute_woodglue
 kimagnet_motormount_re-engineer
 kimagnet_nonferromagnet_frame
 kimagnet_parts
 kimagnet_parts2
 kimagnet_parts3
 kimagnet_redesign_drawings
 kimagnet_shape_cube
 kimagnet_shape_sphere
 kimagnet_shape_v
 kimagnet_shape_zigzag
 kimagnet_shapes
 kimagnet_sphere
 kimagnet_tight_spaced_adjustments
 kimagnet_v
 kimagnet_wire_closeup
 kimagnet_zigzag


